CASE 1: Custom 3D-printed guides used to remove extra poorly-healed bone after trauma of the pelvis

The Story
“Jake came to my clinic aged 31, much younger than the majority of my patients. Aged 17 he had suffered a fracture of his ischial tuberosity while playing football. Unfortunately this failed to unite so he underwent plating of the fracture. Post-operatively he experienced pain in his right hip and thigh radiating down into his calf, which has progressed over the years.
He presented to my clinic as this pain had become unbearable, preventing him from being able to drive, walk up hill and sit. Jake was very keen to get back to his normal daily activities, so we investigated his pain further.”
The Investigation
On examination, Jake had a normal gait. His symptoms were present on the right hand side, which worsened with internal rotation and adduction. There were no neurological features on examination, with good tone, power and normal sensation.
The Evidence

Anteroposterior plain radiograph revealed crowding of the ischiofemoral space as a result of excessive callus healing of the ischial tuberosity and the plate
The Diagnosis
Jake was diagnosed with ischiofemoral impingement secondary to excessive callus surrounding a previous ischial tuberosity fracture and plate.
The Plan
We planned to remove the plate and surrounding callus, reshaping the ischial tuberosity (depending on the insertion of the hamstring). We then planned to perform neurolysis of the sciatic nerve to try and prevent ongoing pain. We knew this operation was going to be highly complex, so we planned to perform this as a combined procedure with the help of a peripheral nerve surgeon.
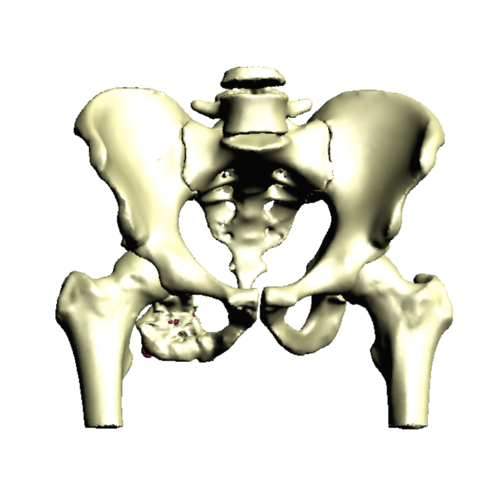
To aid us in the bone resection, we performed a CT scan of Jakes pelvis in order to create a 3D model of his hemipelvis including the additional callus and metal plate of the ischium. We then made a plan as to how best to remove the additional bone and plate without damaging the near by nerve. From this plan, we designed patient specific instrumentation to guide us in undertaking the osteotomy. This guide was designed to locate onto Jake’s ischial anatomy, be pinned in place and be used to achieve the perfect cut.
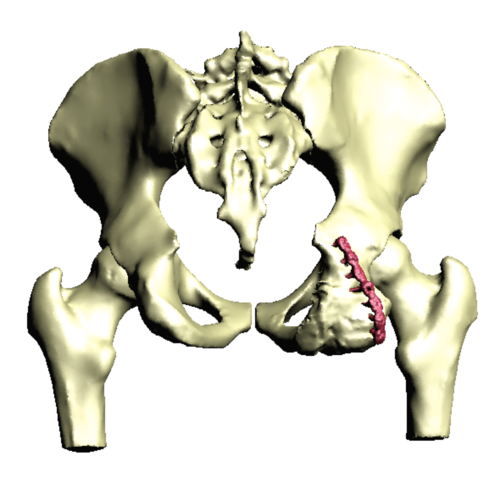

3D pelvis reconstruction produced from the pre-operative CT scan. This demonstrates the ischial plate (red) and the surrounding excessive callus.
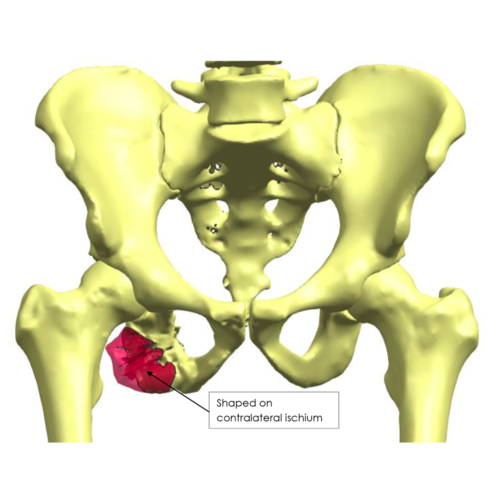
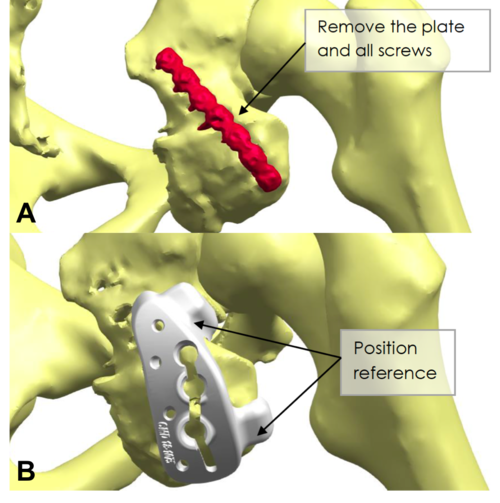
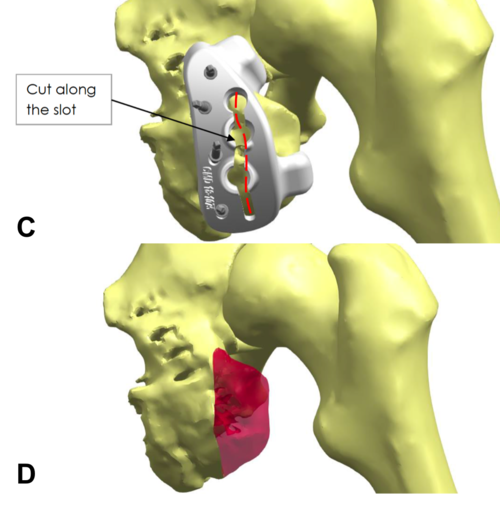
Patient specific instrumentation plan showing the area of bone to be removed. A) demonstrates removal of the existing plate, B) shows the osteotomy cutting guide locating to ischial bony landmarks, C) demonstrates the planned cutting line and D) shows the area of bone to be removed.
The Operation
3D models of Jake’s anatomy were printed and sterilised for use during the operation, showing both the pre-operative landscape and the plan for osteotomy and plate removal.
We approached Jake’s hip through the old incision via a posterior approach. The sciatic nerve was identified and noted to be an anatomical variant with a dilatation over the ischial prominence. We then performed neurolysis of the sciatic nerve, followed by removal of the plate. Using the 3D printed models, we performed the osteotomy to remove the excess bone surrounding the old fracture site.
Sciatic nerve was then transposed and the hamstring tendon was repaired. This was washed thoroughly and the operative site was closed with vicryl, monocryl and glue.
Post-operatively, Jake had to walk with a tip-toe gait using a knee hinge locked at 20 degrees to prevent excessive strain on his newly repaired hamstring tendon for 6-weeks. Following this, the brace was removed and Jake was able to mobilise normally.

Screw removal - This image demonstrates the sciatic nerve (blue arrow) and removal of the screws from the existing ischial plate (white arrow).

3D model and anatomical variant - This image demonstrates the sciatic nerve once again (blue arrow) with an anatomical variant. A branch of the sciatic nerve (white arrow) is seen. This is present in 5% of people and care must be taken to prevent damage to the nerve. The 3D printed model with the ischial plate (red arrow) is also seen, used intraoperatively to map the patients anatomy.

Lower position of the sciatic nerve - After plate removal and the ischial osteotomy, the sciatic nerve is sitting with a much lower profile than before.
The Outcome


Anteroposterior and lateral plain radiographs taken after the operation. They demonstrate the removal of the previous ischial plate.
Jake returned to my clinic three weeks after his procedure and he was doing extremely well. He was able to travel to me on the train, something he would have been unable to do prior to the operation. The wound had healed and his sciatica symptoms had resolved.
At this point he was taking indomethacin with gastric protection to prevent heterotopic bone formation. As per the post operative plan, Jake was still using a knee brace to prevent stress on the hamstring tendon, and I advised him this could come off at 6-weeks and he could start physiotherapy.
At one year after the operation, I reviewed Jake. He reported that his right hip felt totally normal. His Oxford Hip Score was 48/48 and he reported that he was able to cycle 9-miles each way to work, run up to 10-miles and sit for prolonged periods of time. On examination, there were no abnormalities. He was thrilled with the outcome!
Jake said deciding to have the operation was the best decision he has ever made. We were over the moon with the result.
The Verdict
“3D CT planning enabled me to explain the proposed operation to the patient. The 3D printed models of the patient’s anatomy helped me better understand which surgical approach to use, how to protect the sciatic nerve and how much bone to remove.
The patient specific cutting guide helped me decide how much bone to remove during the operation.”
-
Surgeons and engineers constantly search for methods to improve the surgical positioning of implants used for joint arthroplasty.
Rapid prototyping is being used to develop patient-specific instrumentation (PSI) and has already been successfully translated into large-scale clinical use for knee arthroplasty.
PSI has been used in shoulder arthroplasty; however, it is not yet known whether PSI provides improved accuracy and outcomes compared with conventional methods in either shoulder arthroplasty or knee arthroplasty.
In the hip, PSI has been limited to the positioning of custom-manufactured implants and a small number of surgeons testing the emerging solutions from different manufacturers. Early results indicate consistent accurate positioning of implants with the use of PSI in hip arthroplasty but with added costs and uncertain effect on clinical outcomes.
-
There are no similar cases, however, the use of 3D printed surgical models is increasing:
-
Please see Case 38