CASE 15: Revision of a loose cup due to massive circumferential acetabular osteolysis from polyethylene wear, using a custom 3D-printed cup

The Story
This 67-year old gentleman’s hip problems started over 50 years ago due to trauma. After a primary and a revision, he was left with a girdlestone.
He then underwent three further hip replacements to leave him in the pre-operative situation. The final hip replacement had lasted 13 years.
Imaging revealed anterior and medial wall deficiencies with a raised centre of rotation. The posterior column remains intact.
The Evidence

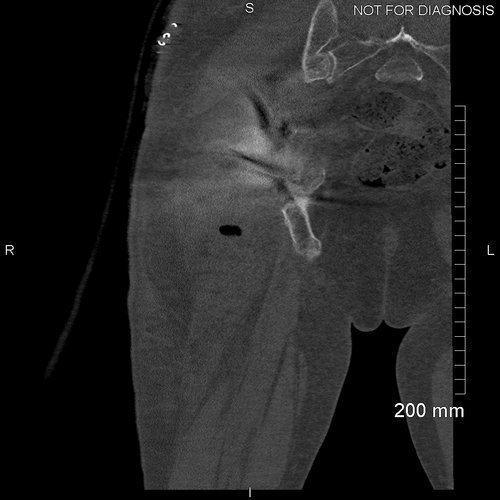
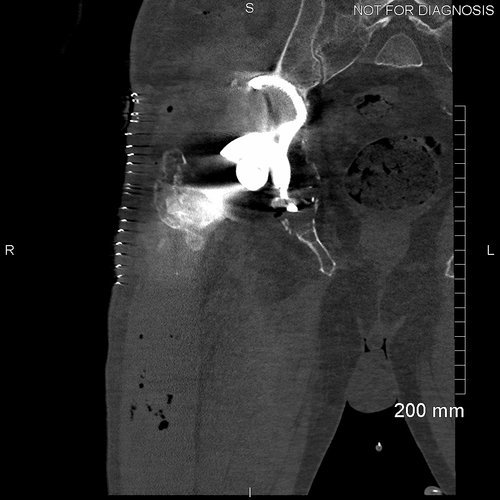
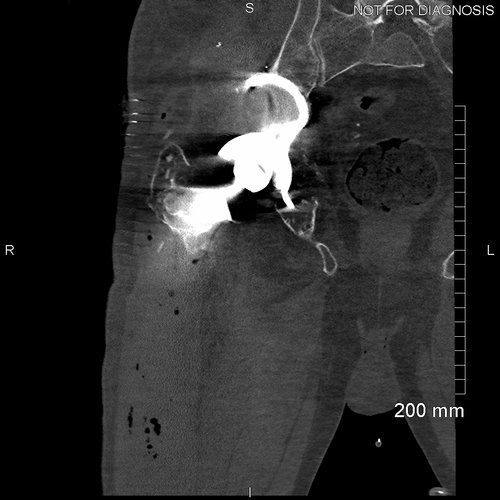
A pre-operative radiograph demonstrating the medial migration of the acetabular cup into the pelvis

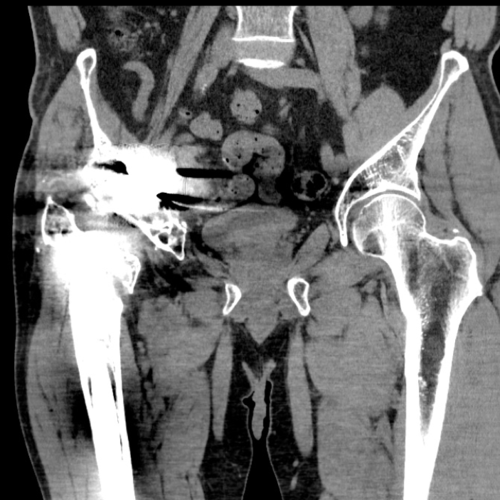
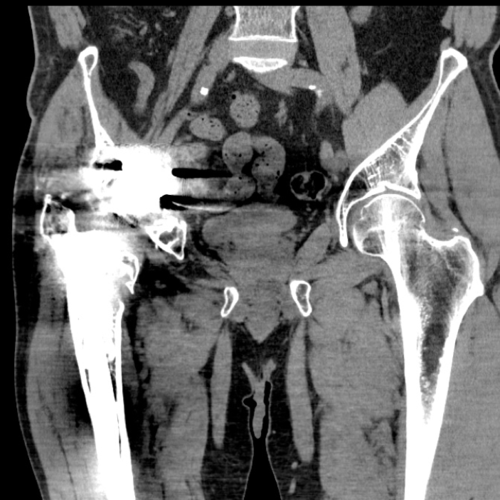
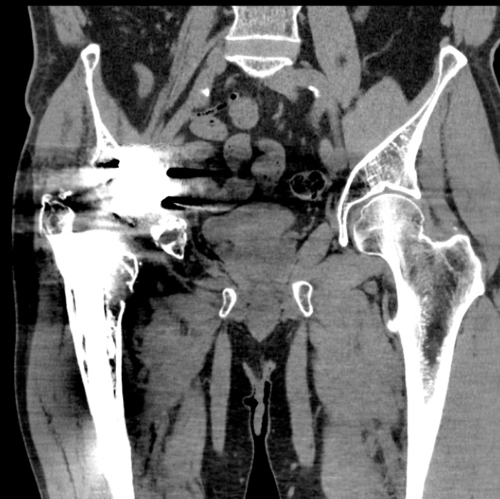
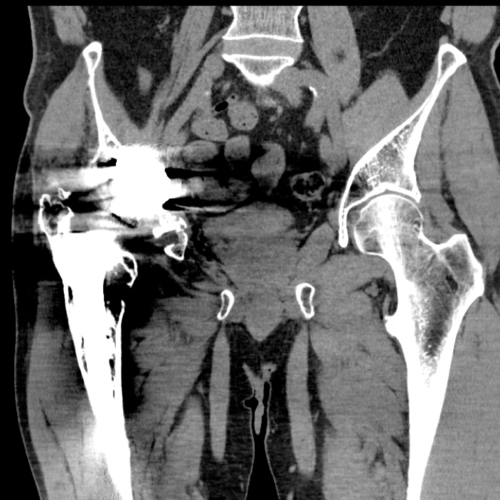
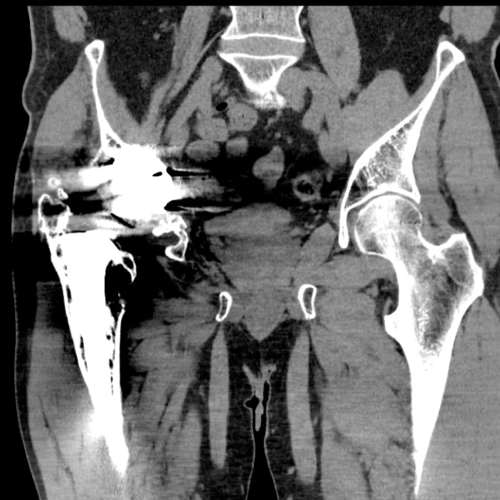
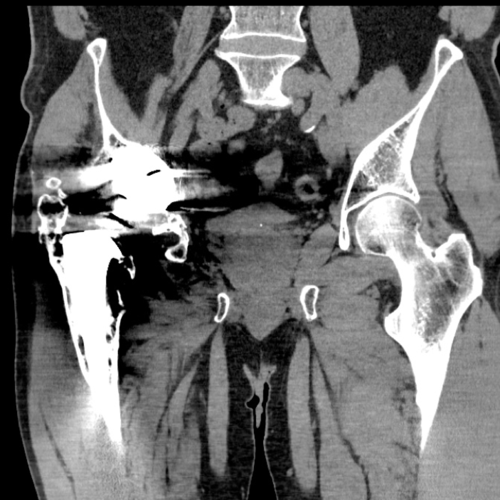


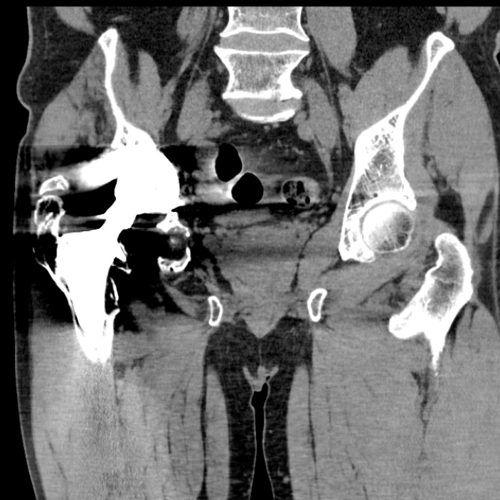
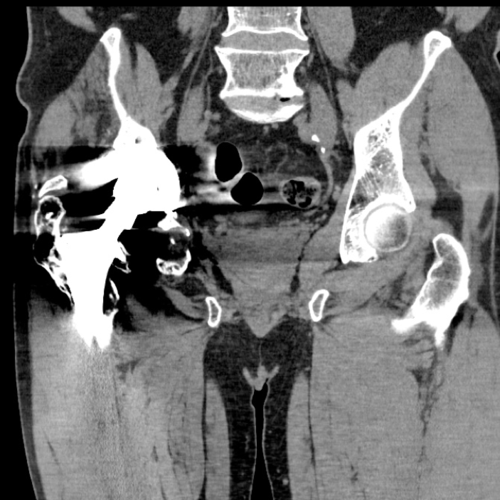

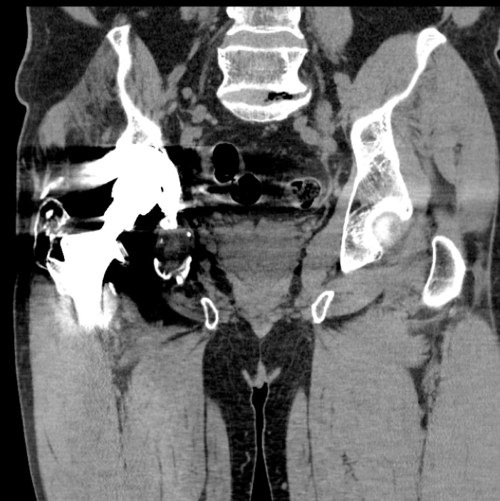
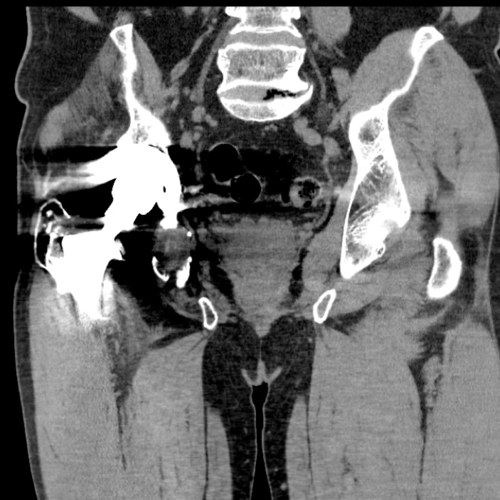

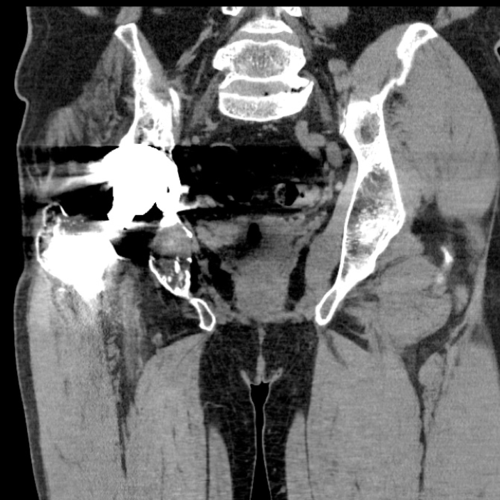
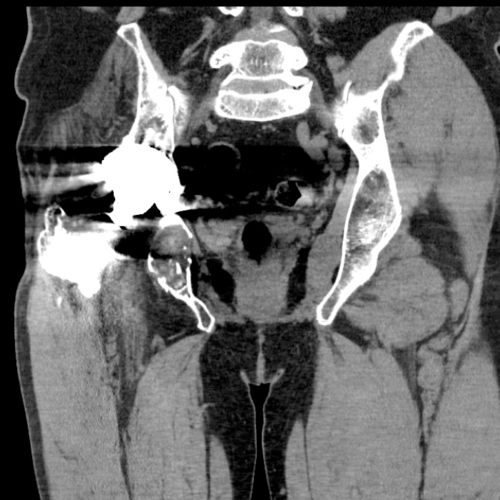
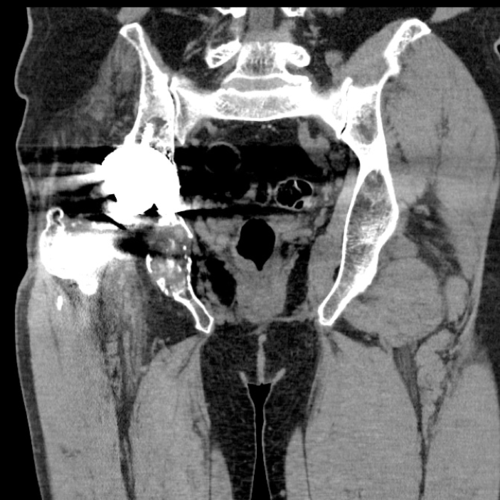
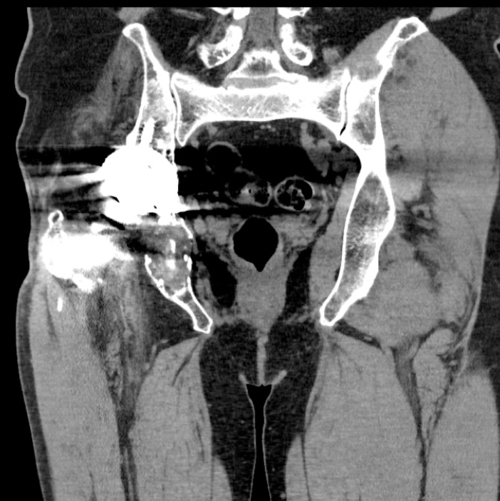
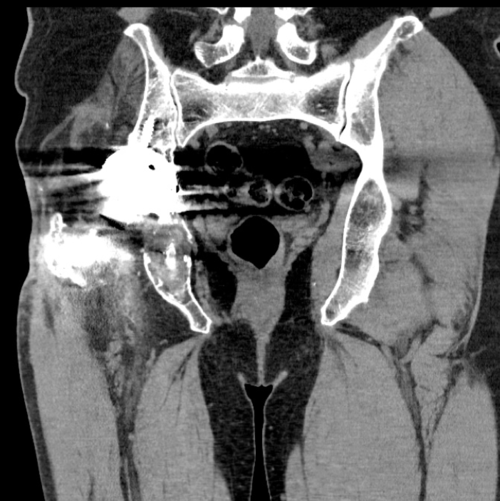
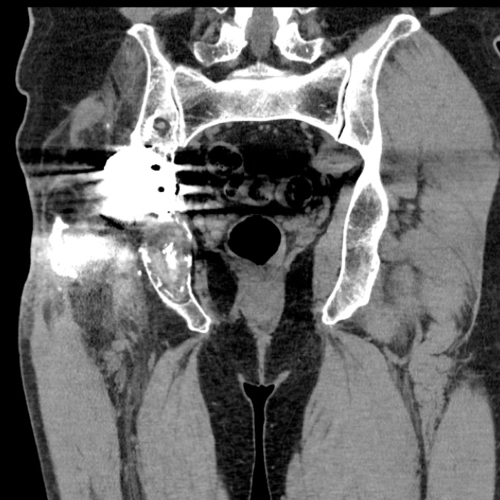
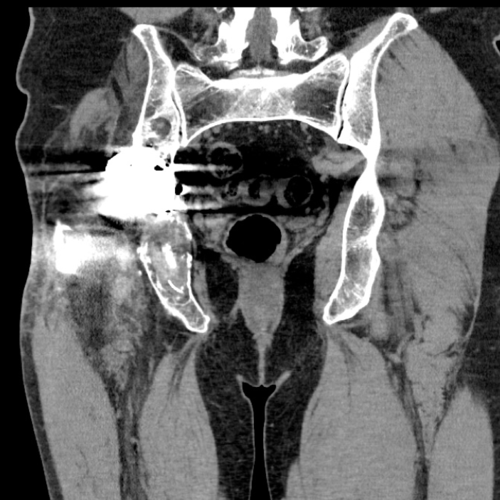
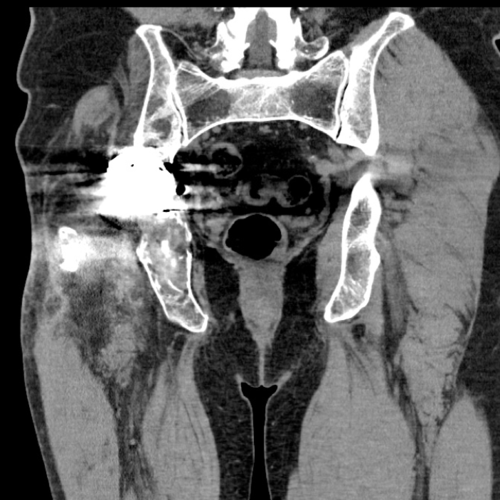
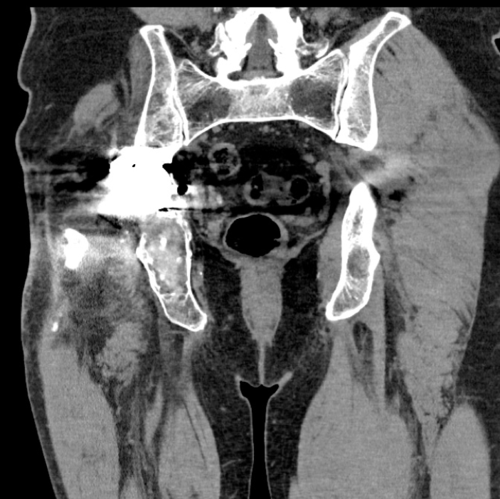

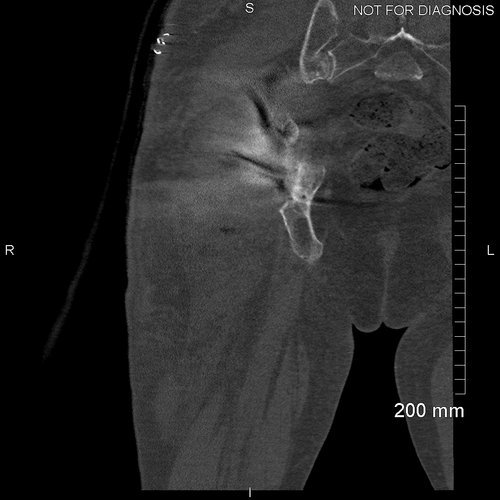
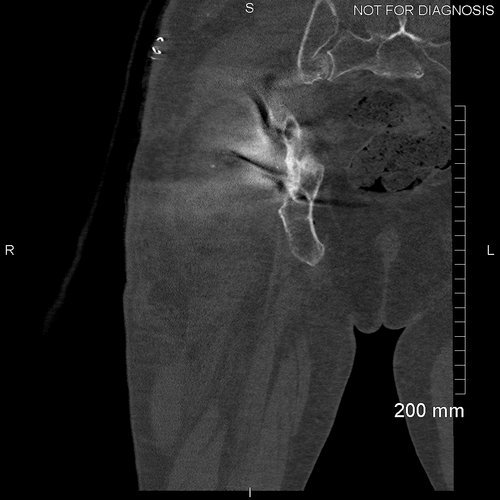
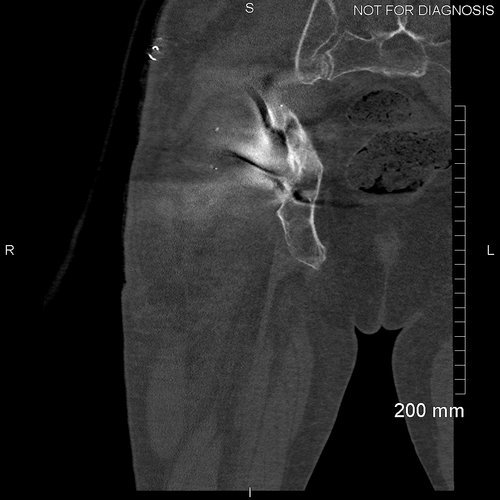
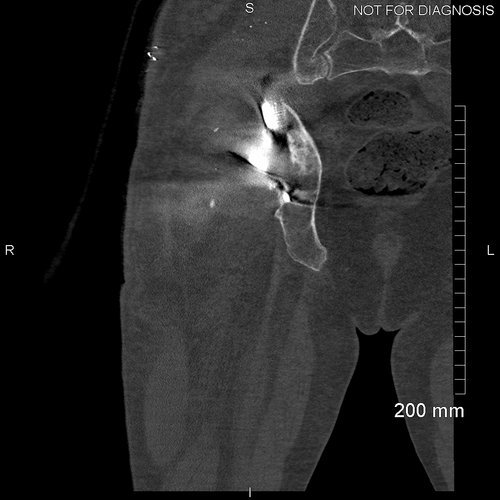
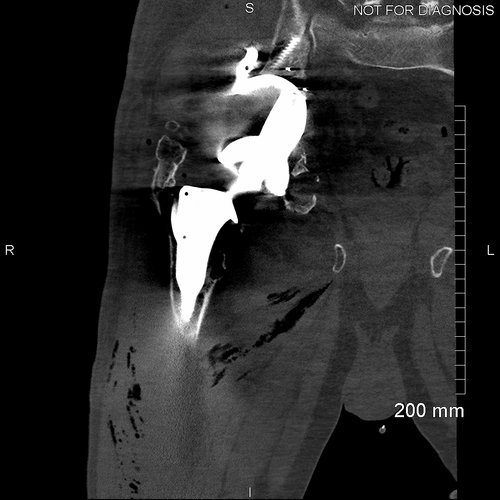
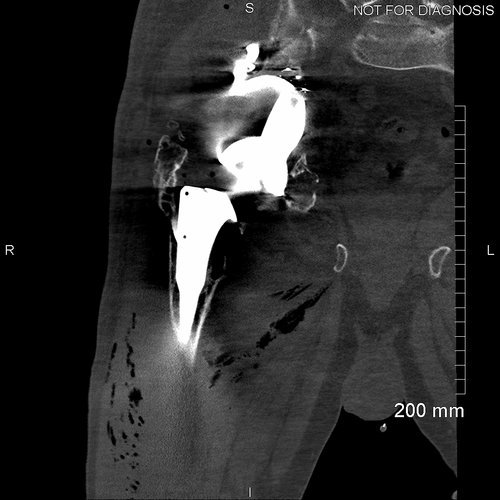
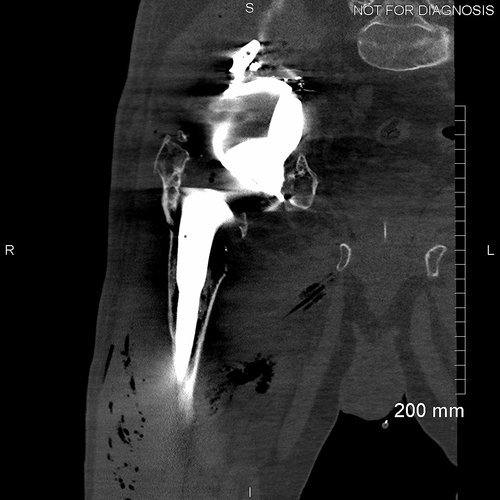
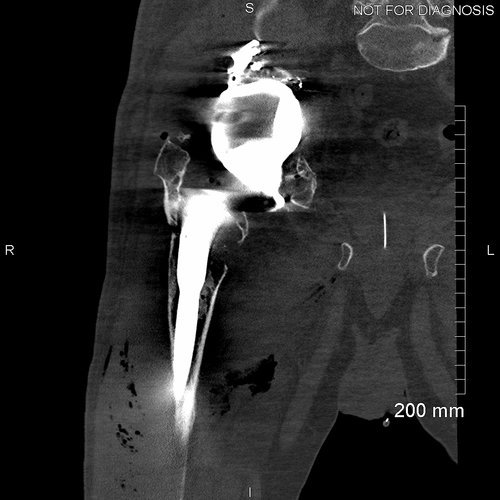
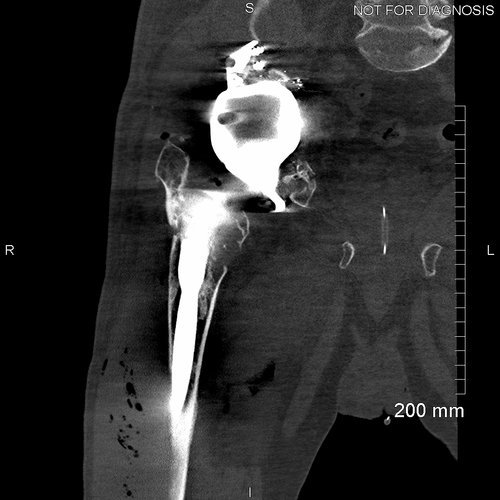
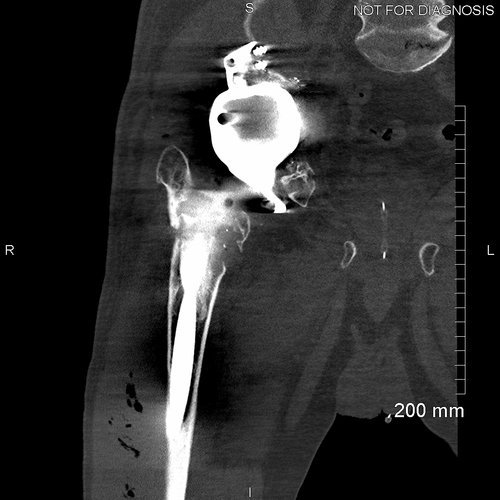
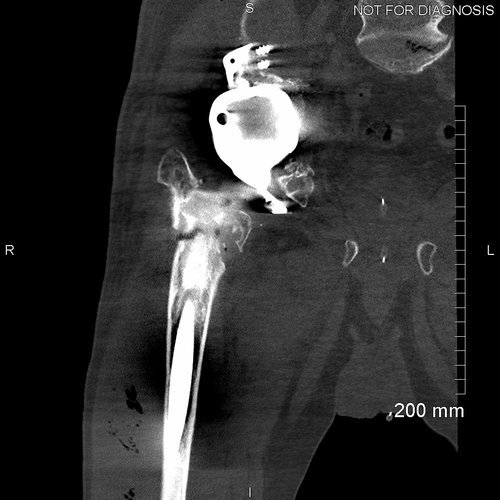
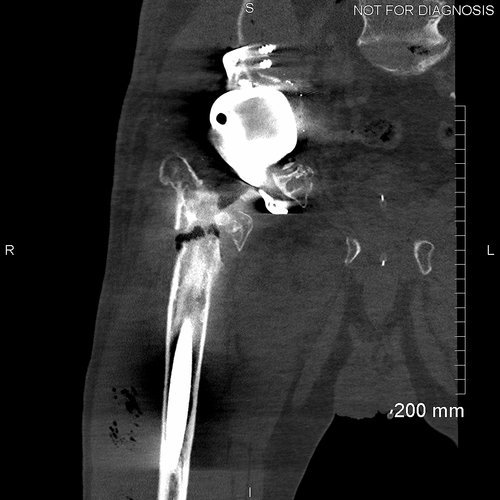
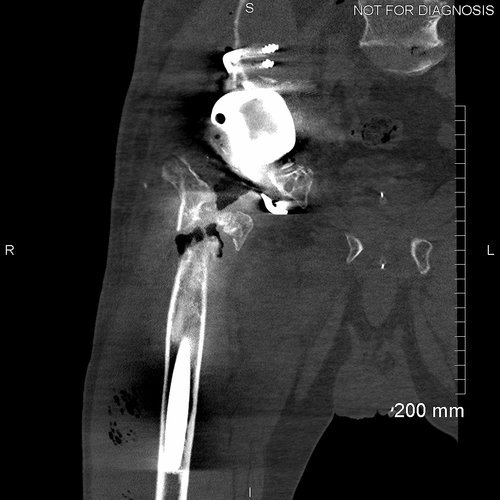
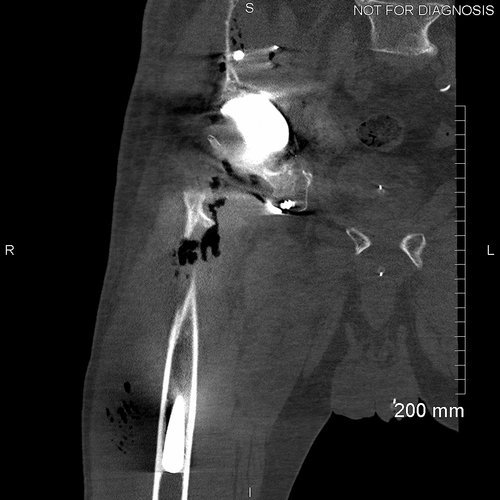
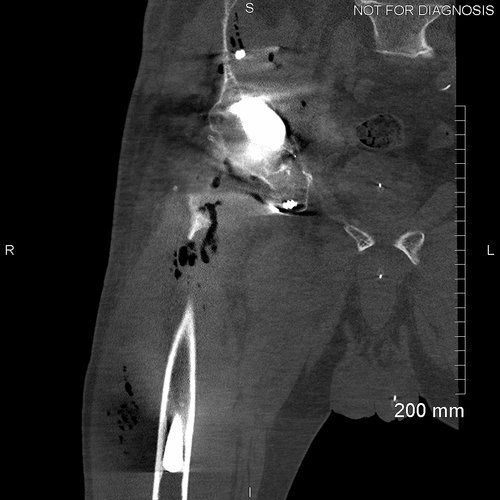
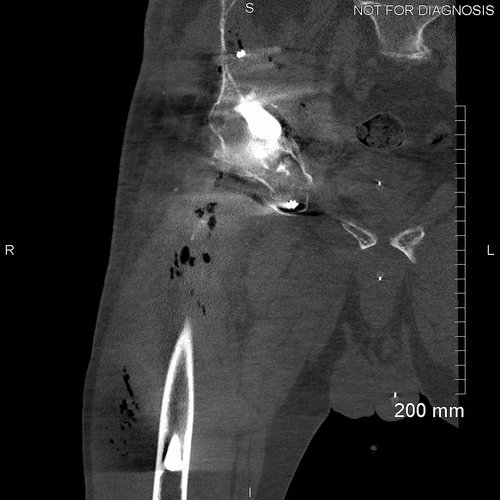
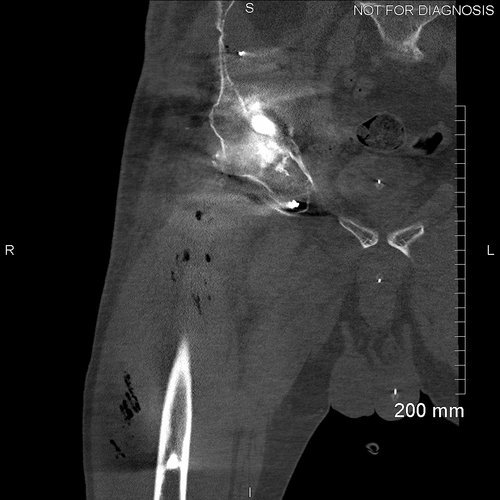
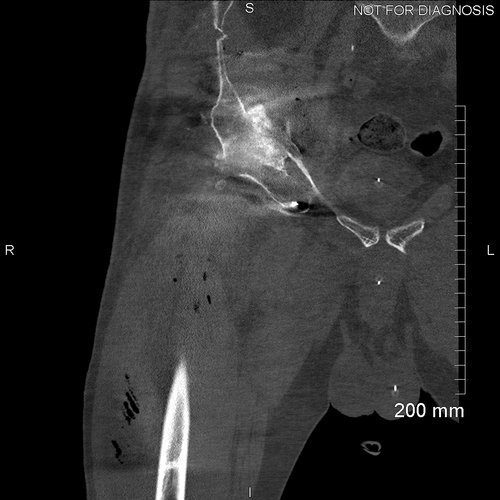
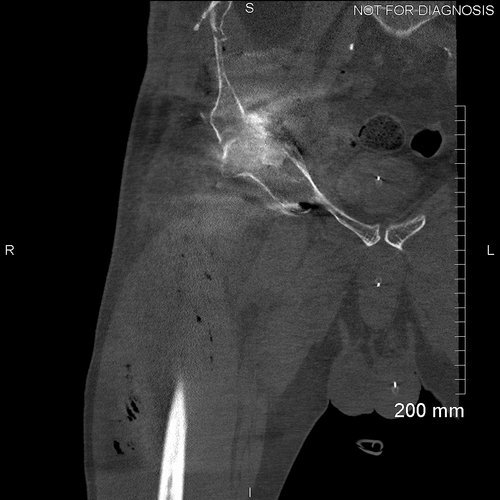
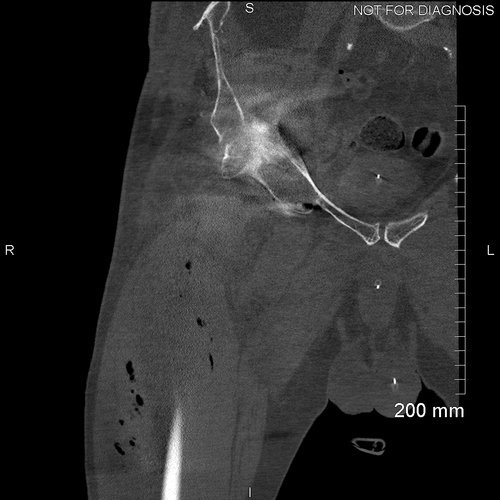
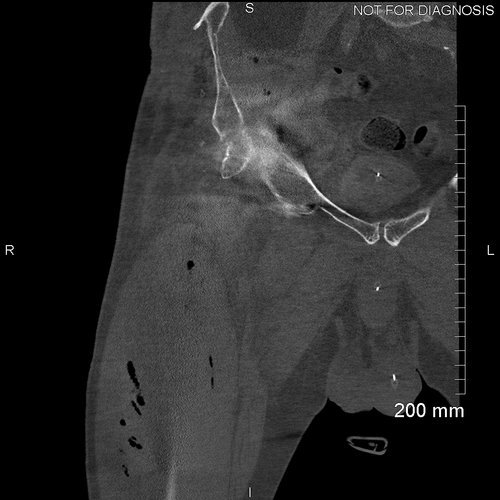
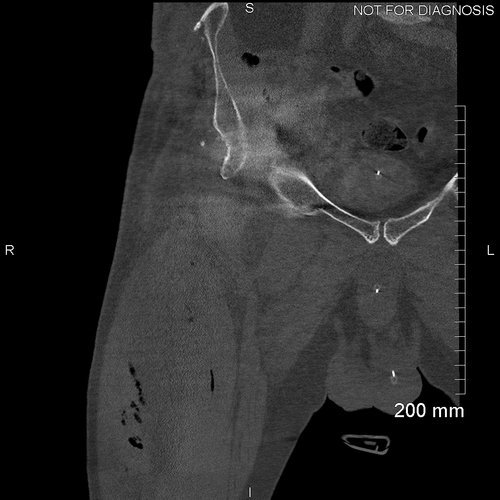
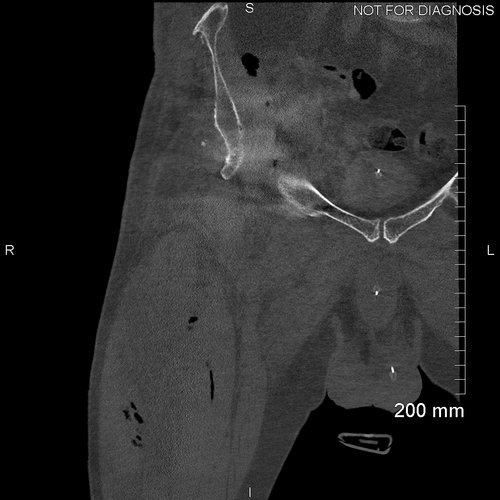
The pre-operative cross sectional imaging demonstrates the extent of the intrapelvic migration

This is a 3D reconstruction of the patient’s right hemipelvis created from the above CT scan. This provides a much better picture of the 3D defect compared to the plain film radiograph and the CT scan alone. There is complete loss of the medial acetabular wall in this case.
The Diagnosis
Right hip replacement causing mechanical symptoms requiring revision with a Paprosky 3B acetabular defect.
The Plan
Implant Design
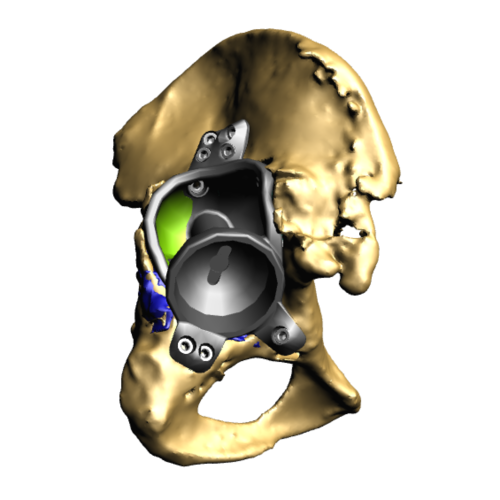
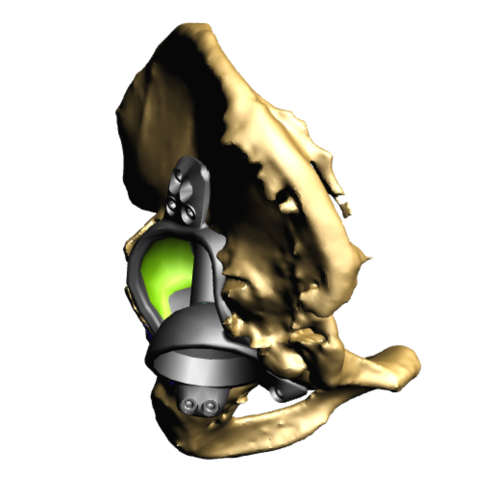
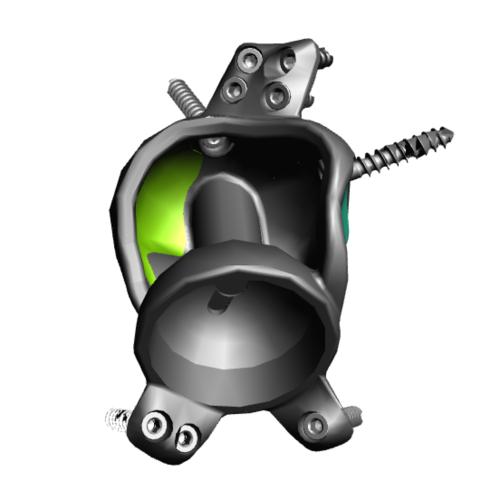
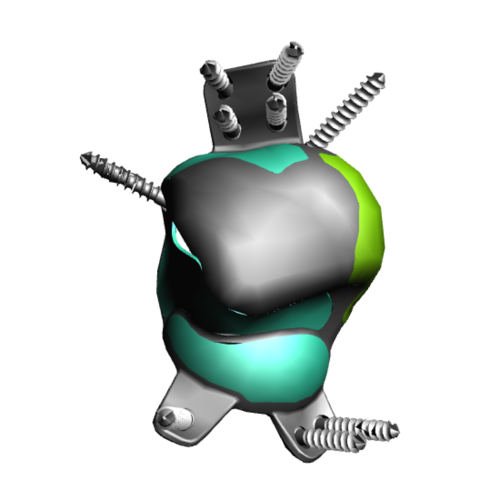
This series of images shows the implant within the 3D reconstruction of the patient's hemipelvis and the stand alone design.
This design has three flanges, one to the ischium, one to the pubic bone and one to the iliac crest. The green areas highlight regions made from trabecular titanium.
Trabecular Titanium

This image shows the 3D printed trabecular titanium material in detail
The Operation
Key surgical steps:
Posterior approach to allow extensile exposure of acetabulum and femur.
Release of psoas and gluteus maximus from the femur, and abductors from the ilium.
Bone preparation with reamers according to 3D computer plan and checking using sterilised plastic 3D-printed models of the acetabular pre and post bony preparation.
3D printed trabecular titanium implant secured with at least 3 good screws.
Dual mobility bearings 44mm.
Cement-in-cement, small sized stem to allow for adjustment of offset and leg length.
Wash.
The Outcome

Post-op radiograph - This is the immediate post-operative radiograph with the large acetabular implant in situ
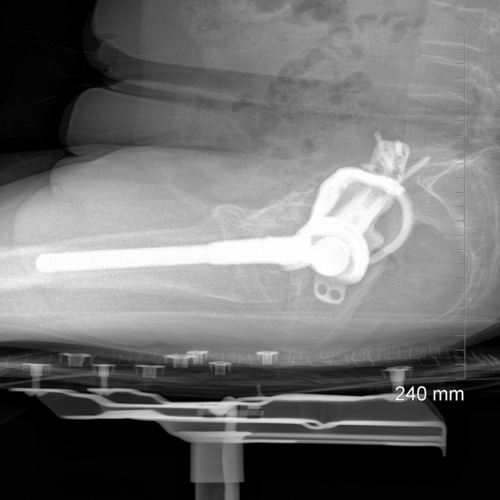
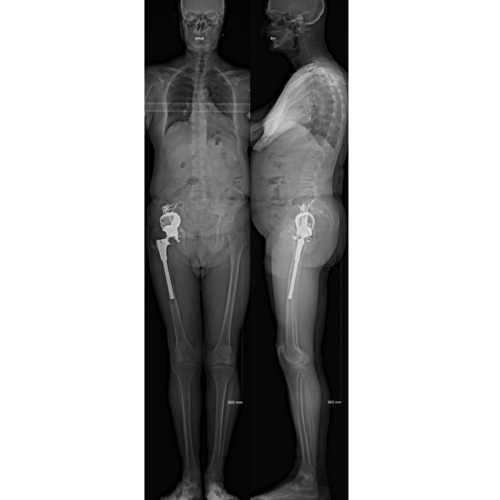
Post-operative EOS - the scan shows the new implant in its functional position. The existing leg length discrepancy has been corrected.


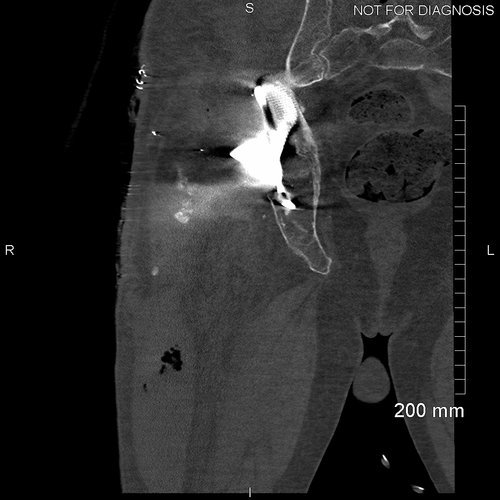

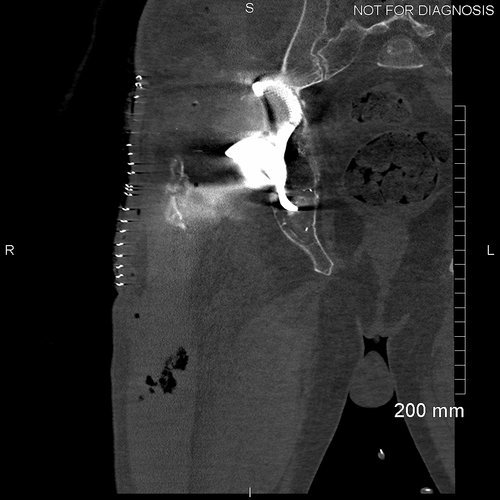


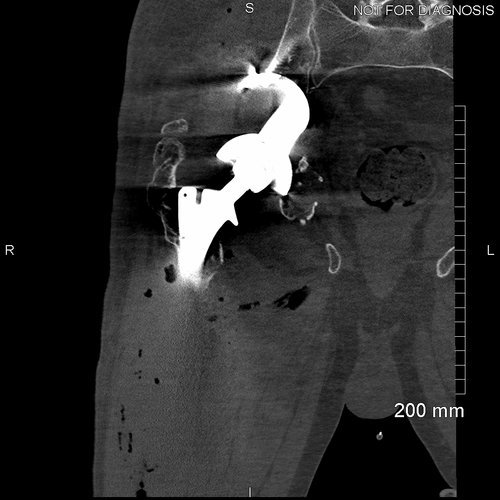
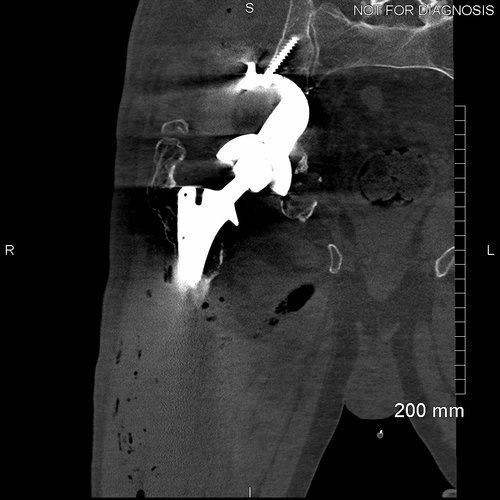

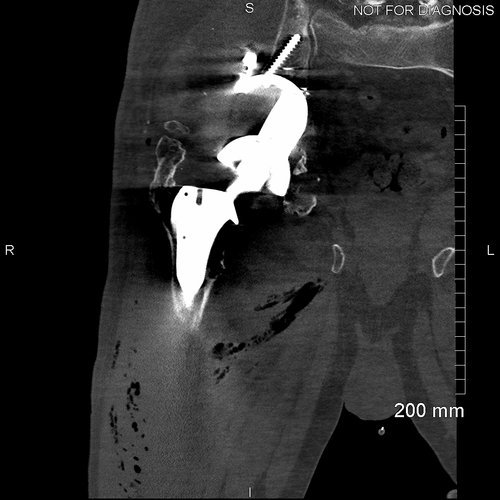


Post-Op CT - The post-operative CT scan shows great implant positioning with a good percentage of bony contact

6 weeks year Post-Op Radiograph - There is no migration present on the radiograph at 6-weeks. The surgical staples have been removed
The Verdict
“At 9-months post-op the patient was able to mobilise with the aid of a single crutch and was back to using an exercise bike.
The EOS scan showed above revealed a corrected leg length discrepancy. At 9-months follow-up the implant was performing very well clinically.”