CASE 14: Revision of a recurrently dislocating hip with large acetabular defect, using a custom 3D-printed cup

The Story
“Henrietta was 69-years old when we first met. She had undergone multiple operations to her right hip. After a primary right sided hip replacement, the initial acetabular cup was revised twice to leave her with a 60mm trilogy shell and a constrained liner with a 32mm femoral head.
She presented having noticed shortening in her right leg and pain in the right hip. This was seen radiographically, so she was referred for a revision. Between the referral and the surgery, Henrietta fell causing a periprosthetic type C fracture to the right femur and dislocation of the replacement joint.
This was managed with open reduction internal fixation using a distal femoral locking plate prior to the acetabular reconstruction. Henrietta underwent a CT scan after the right femoral fracture to plan her custom acetabular component.”
The Evidence

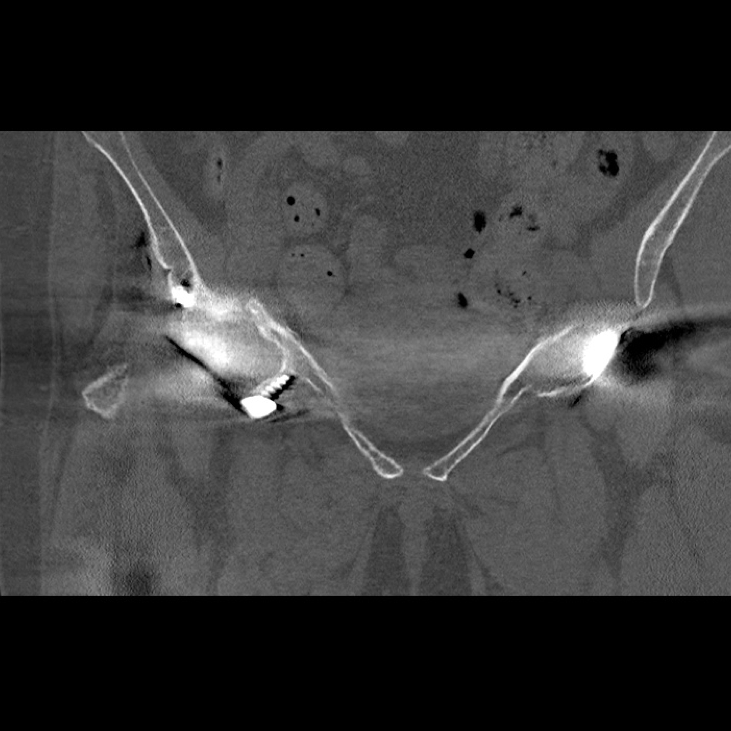
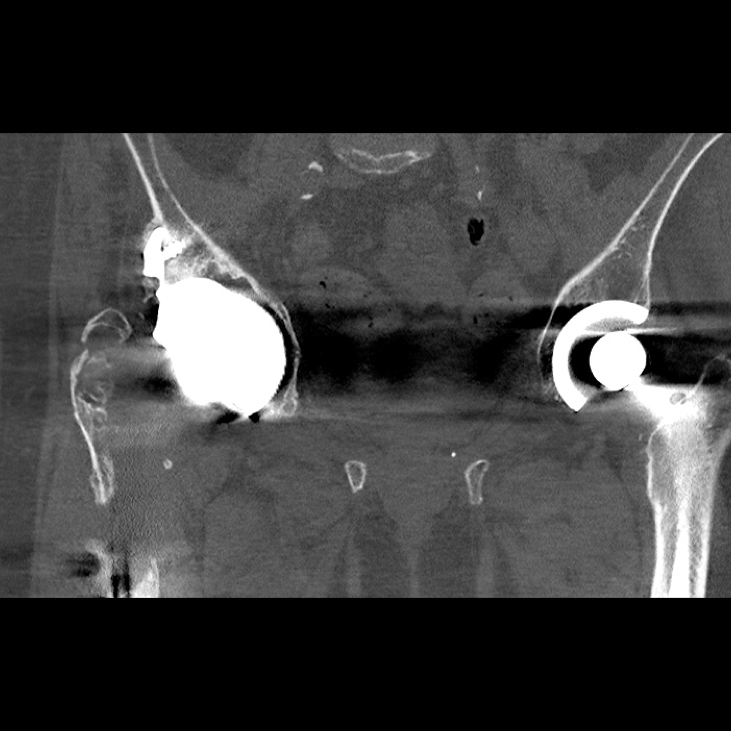
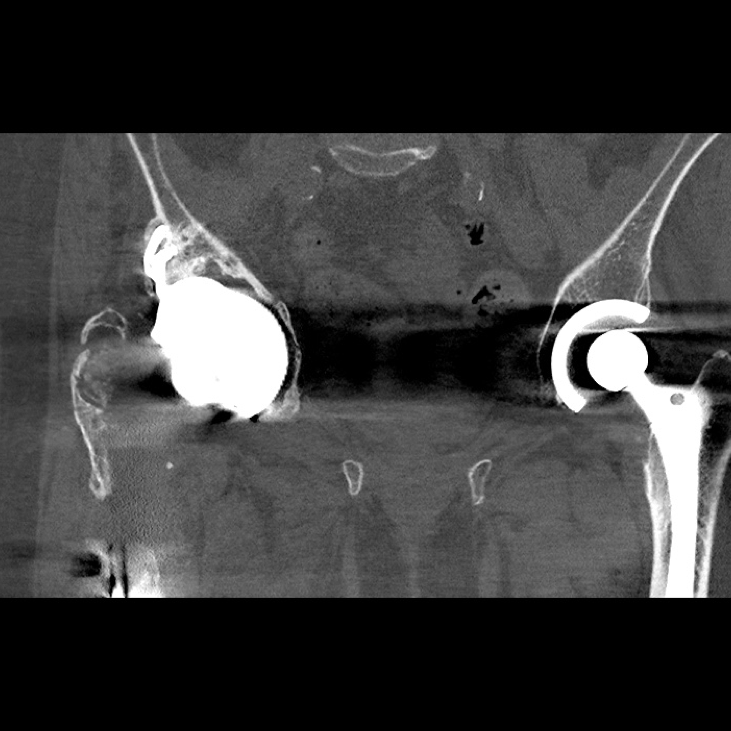
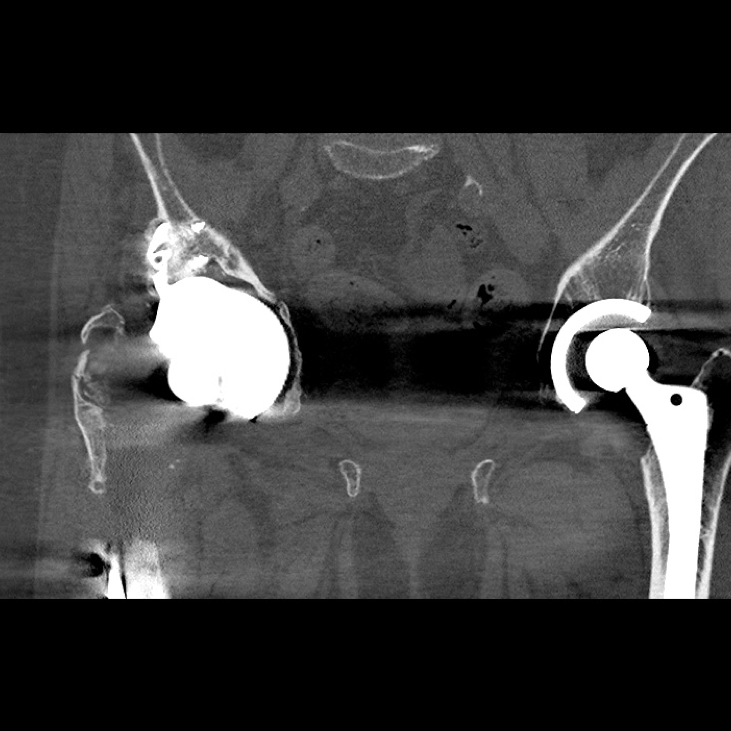
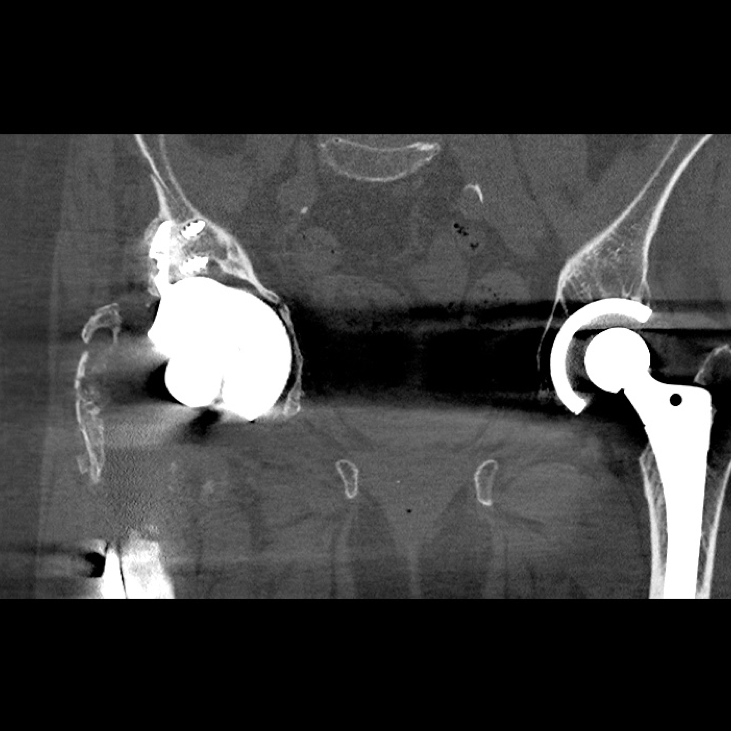
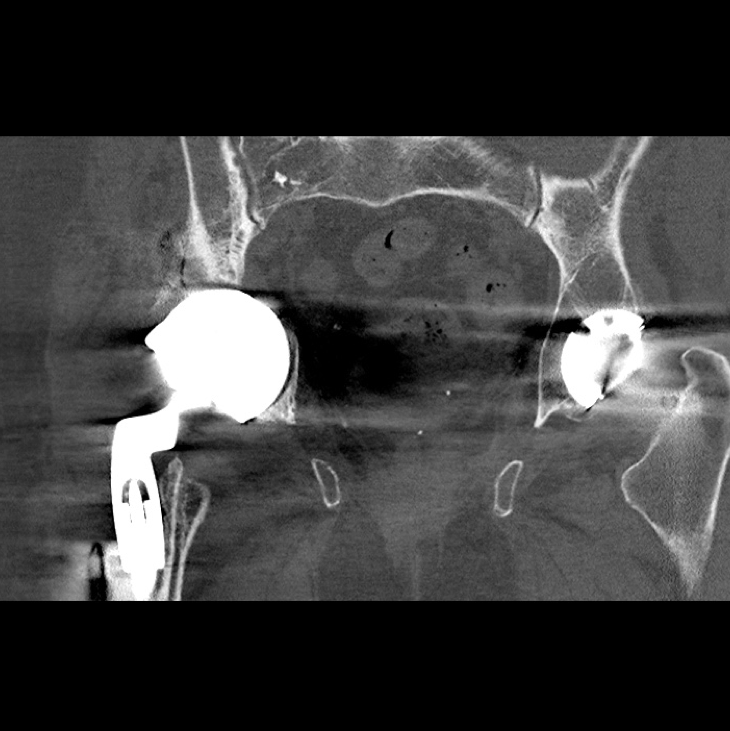
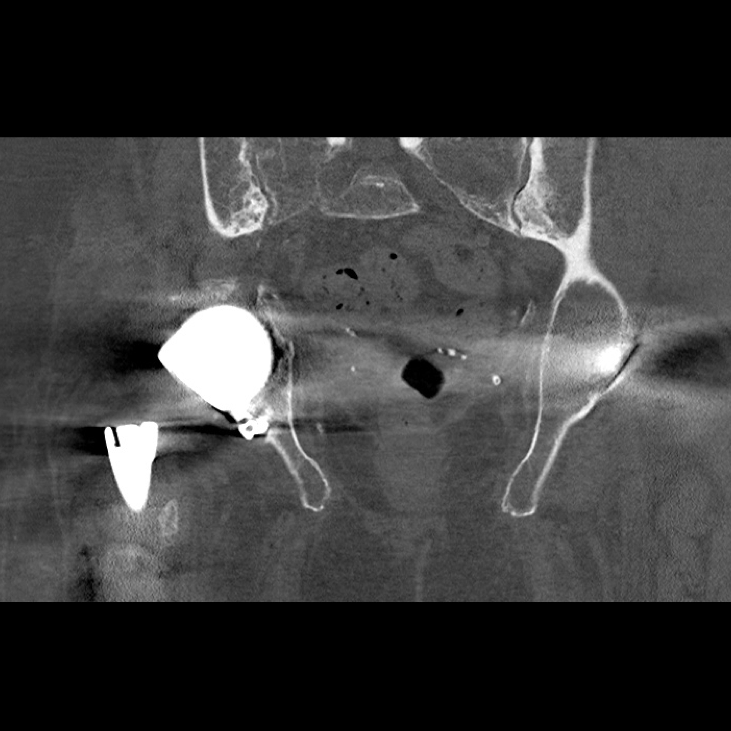
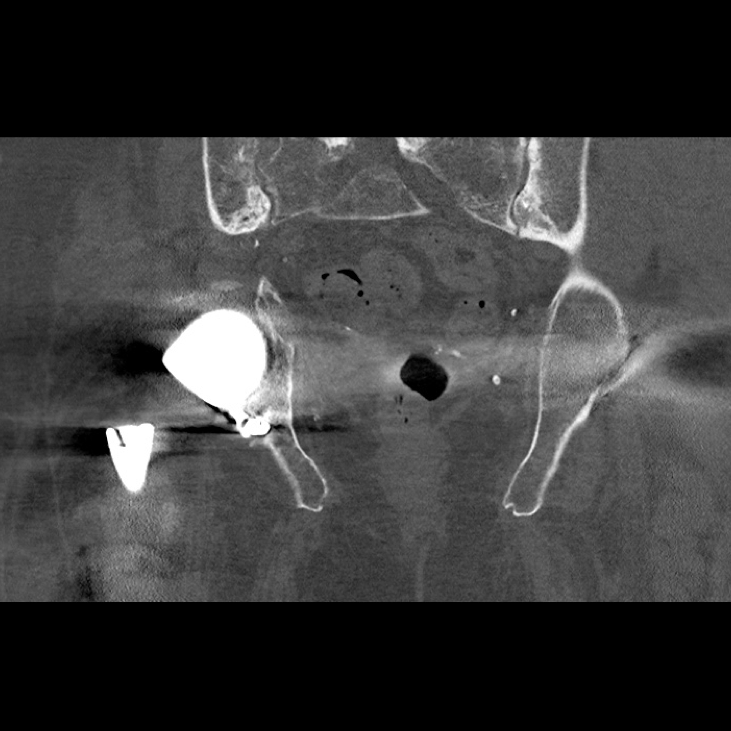
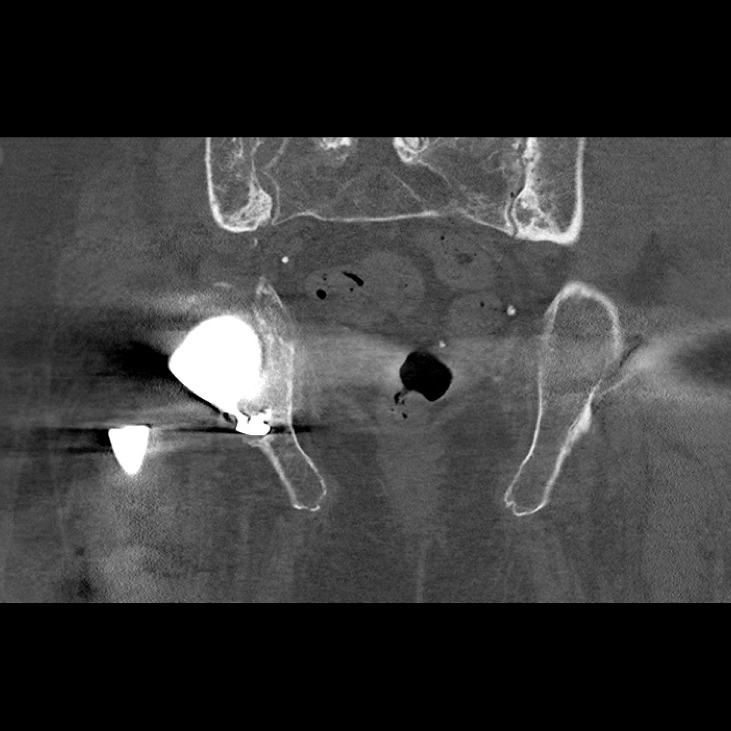
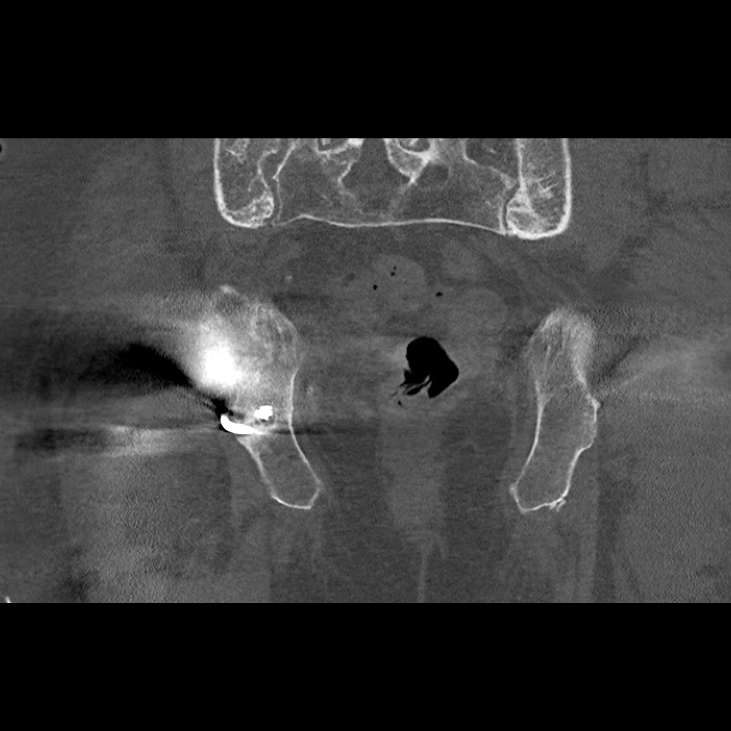
A pre-operative scannogram demonstrating the dislocation of the right implant from the constrained acetabular liner
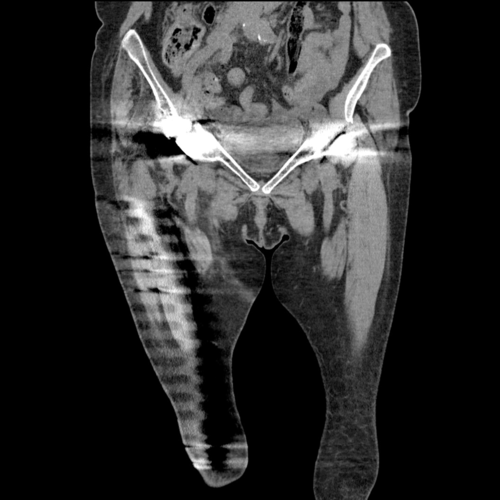
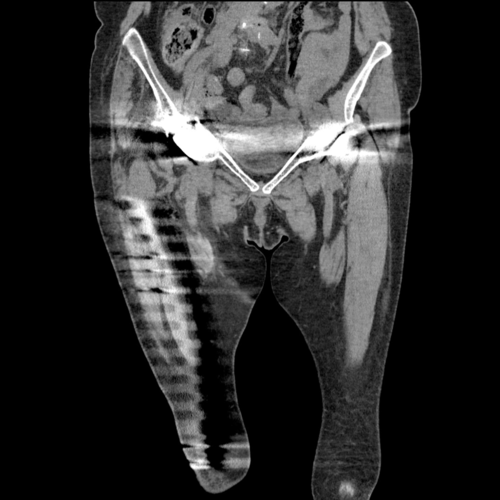
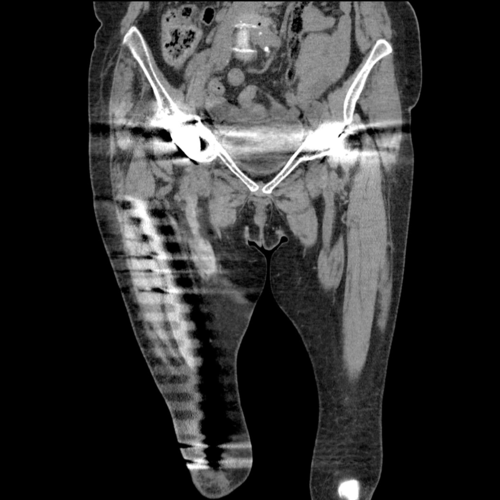
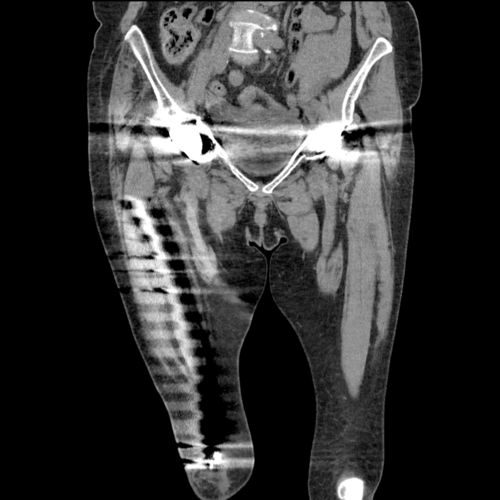
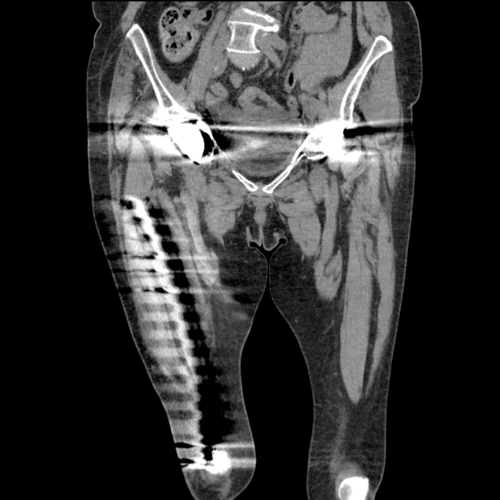
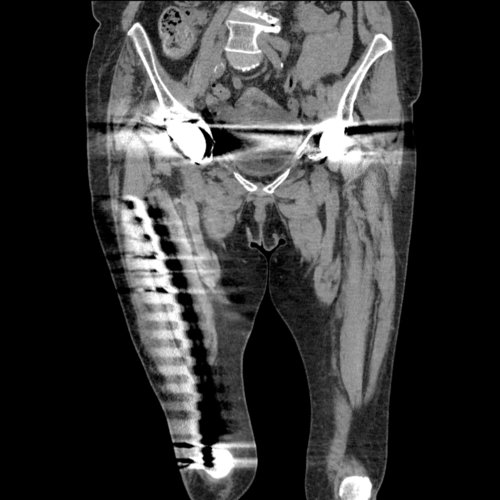
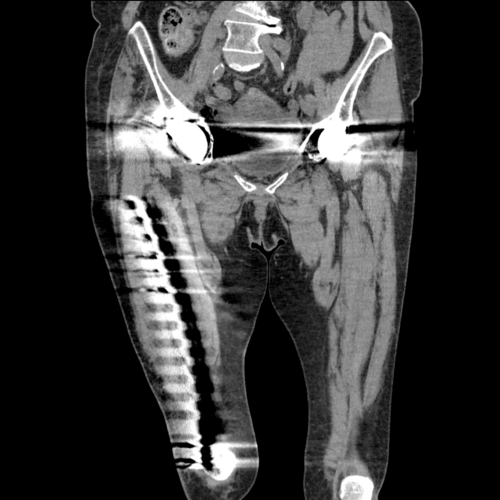
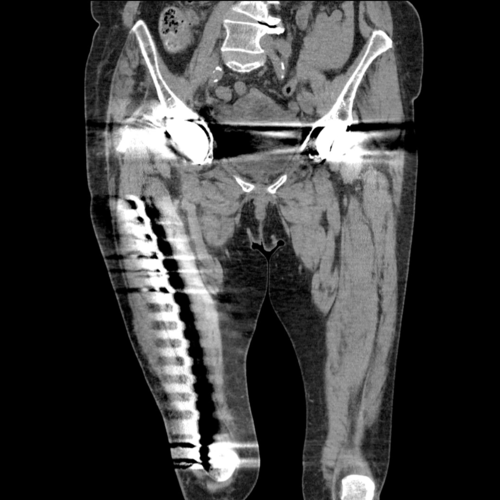
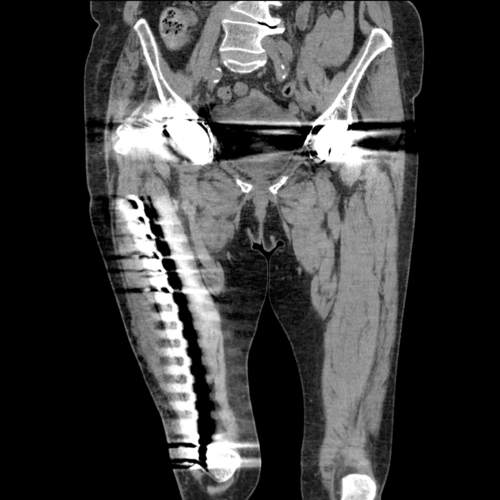
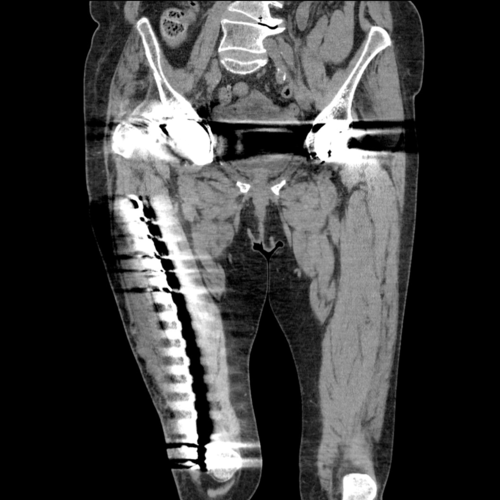
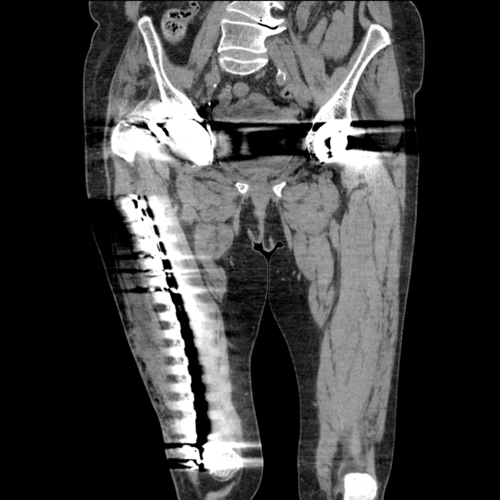
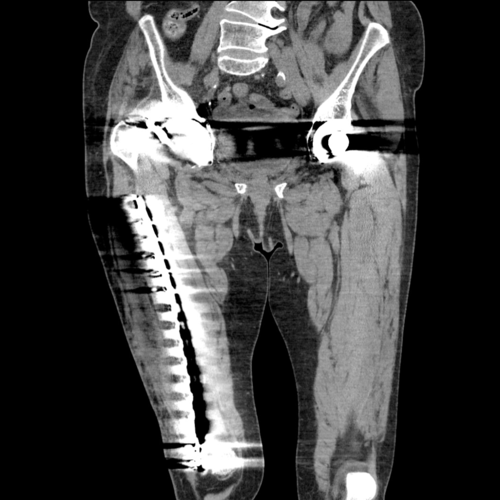
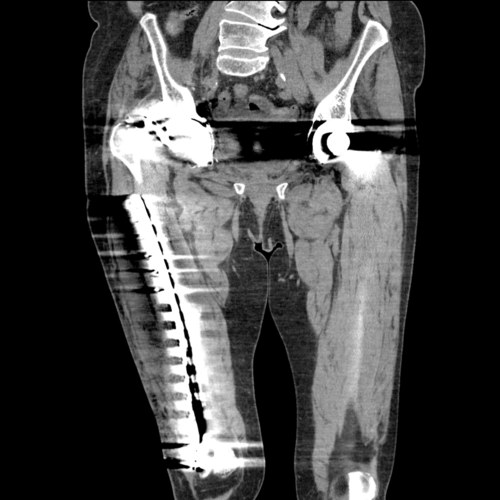

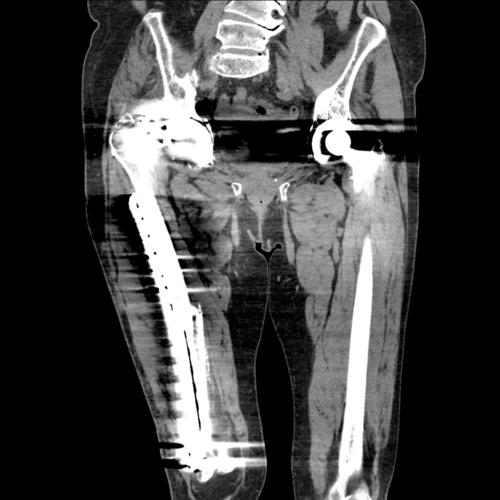

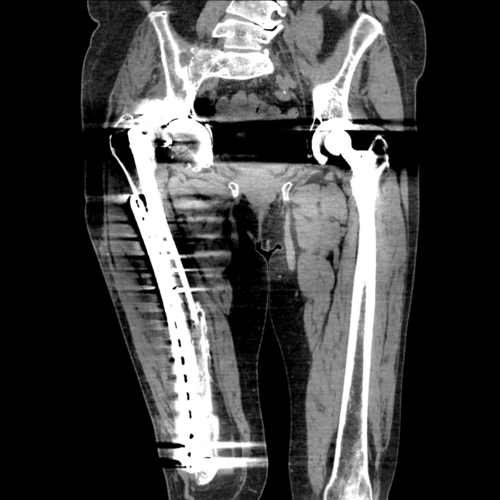
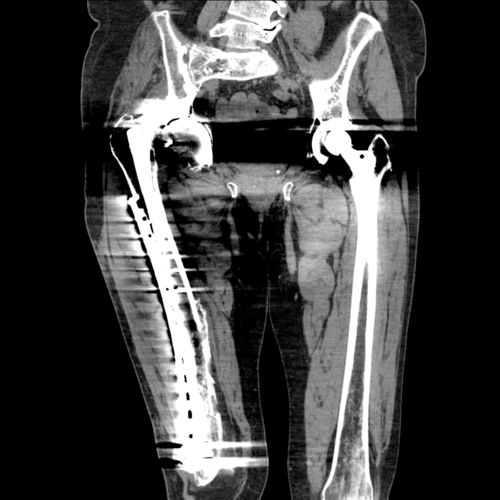
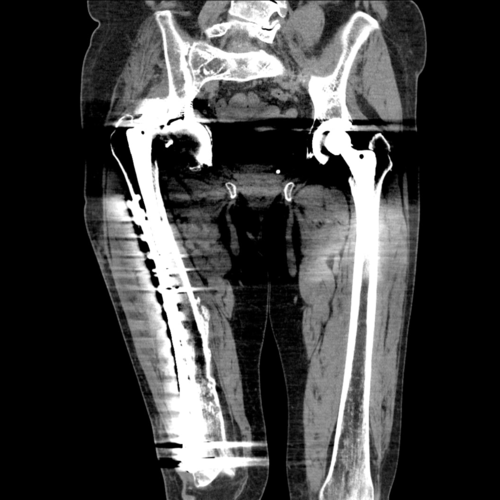
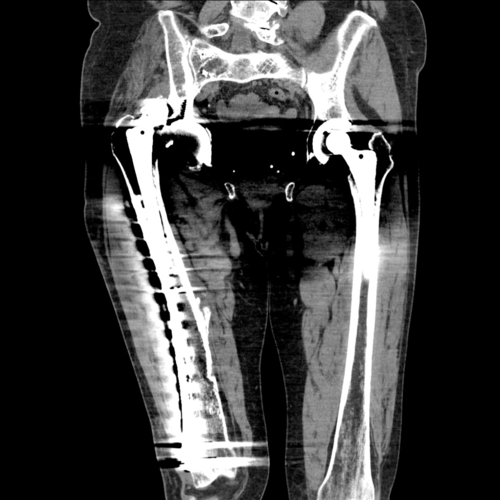
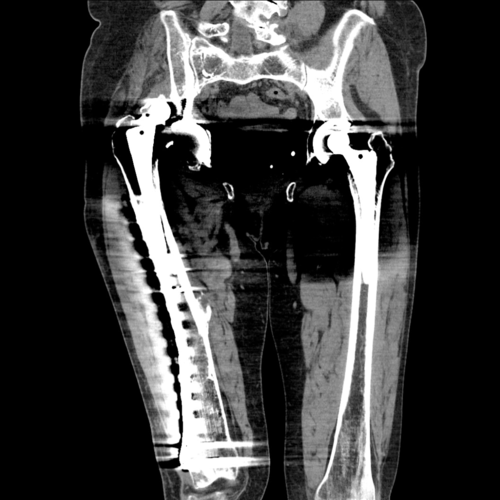
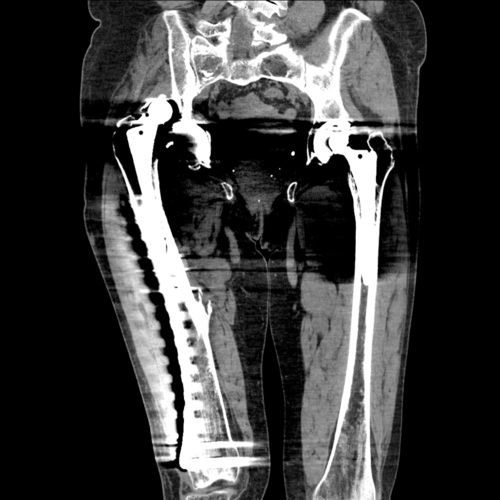
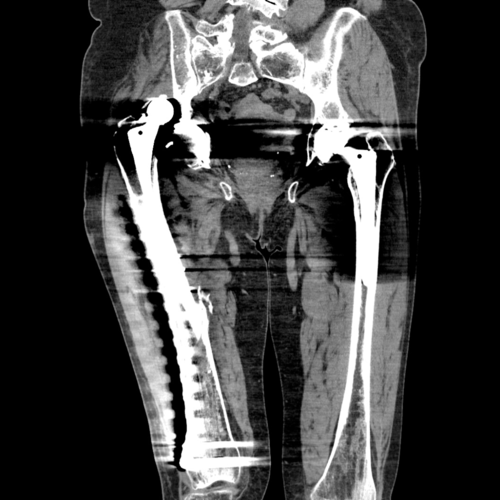
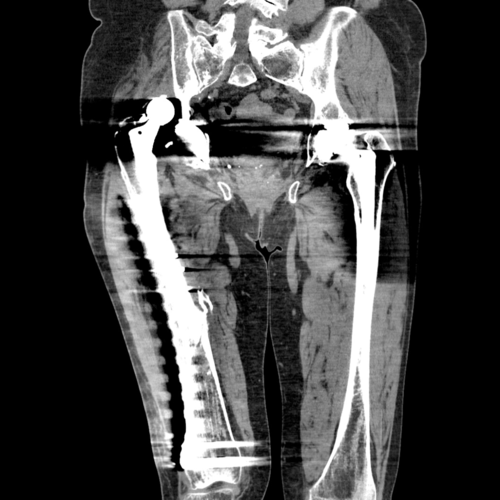
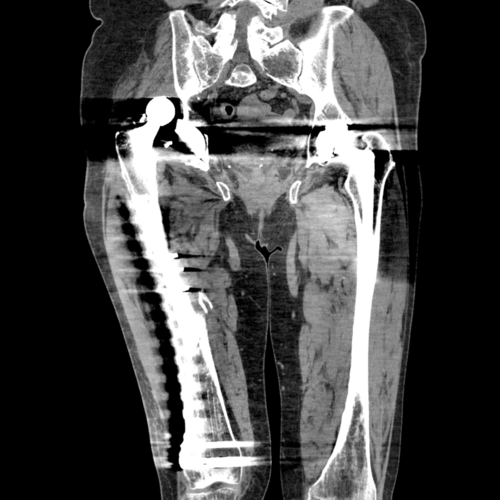
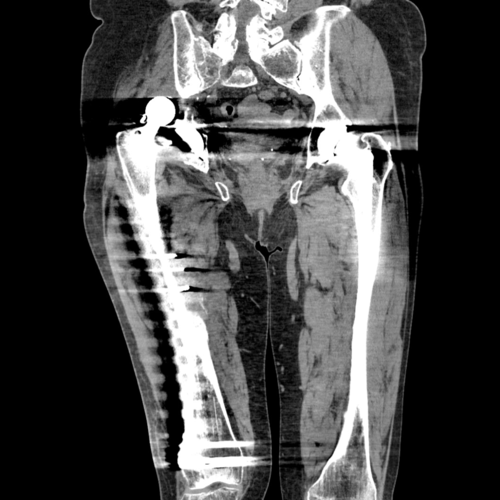
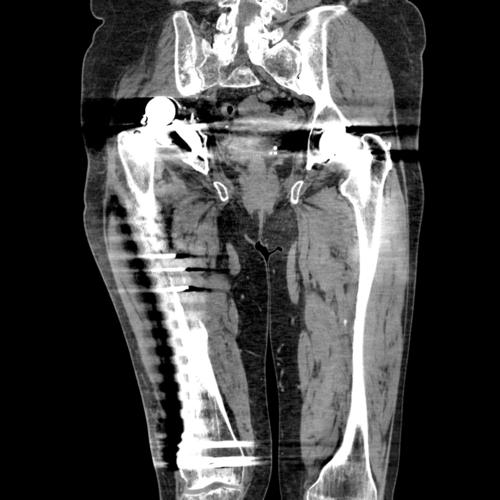
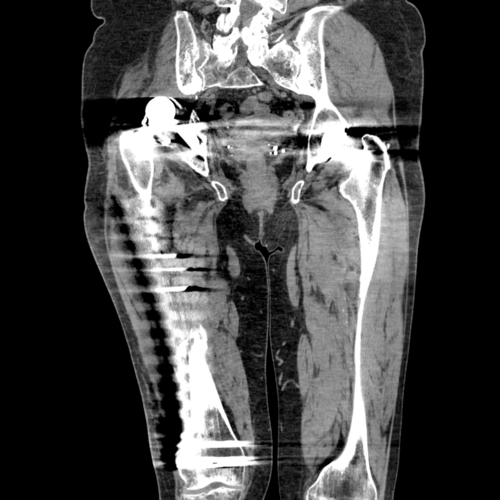
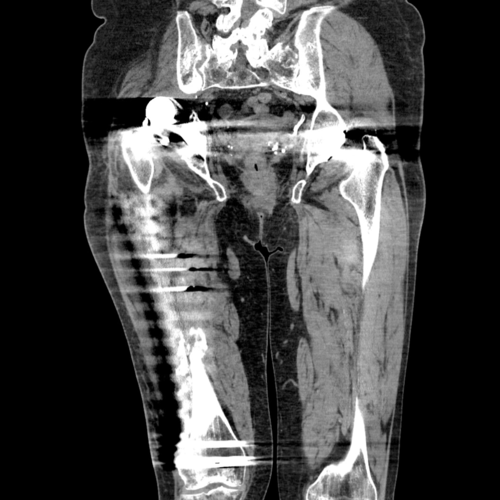
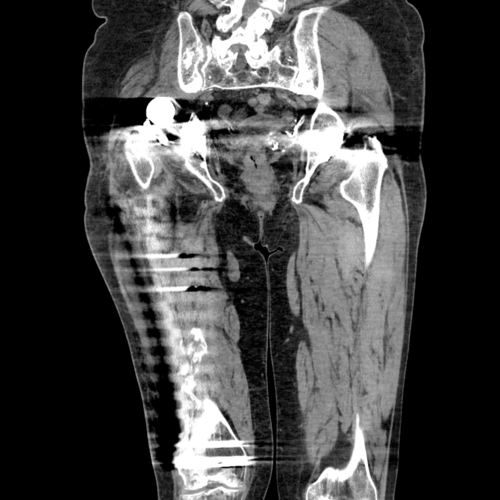
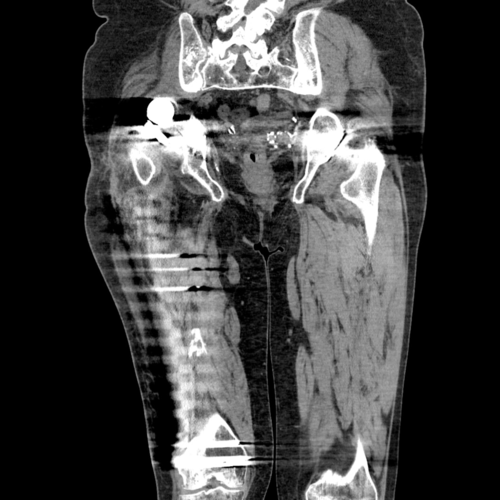
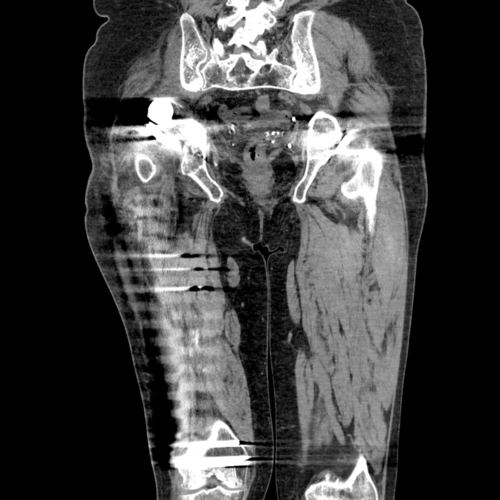
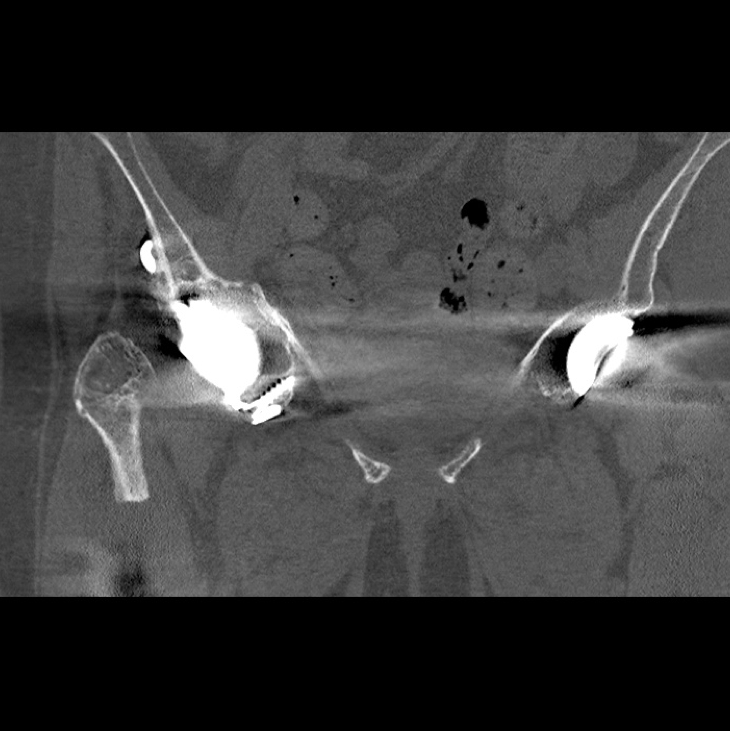
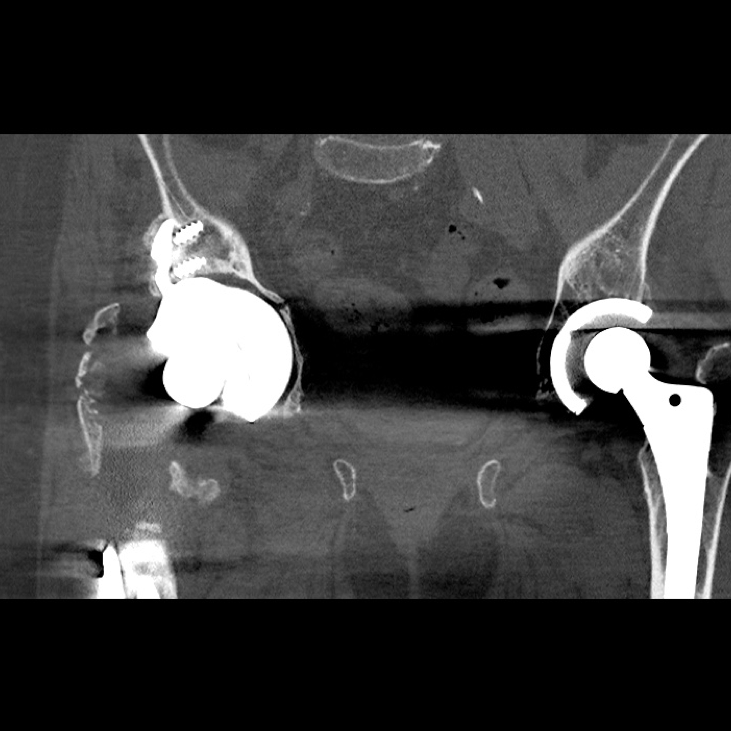
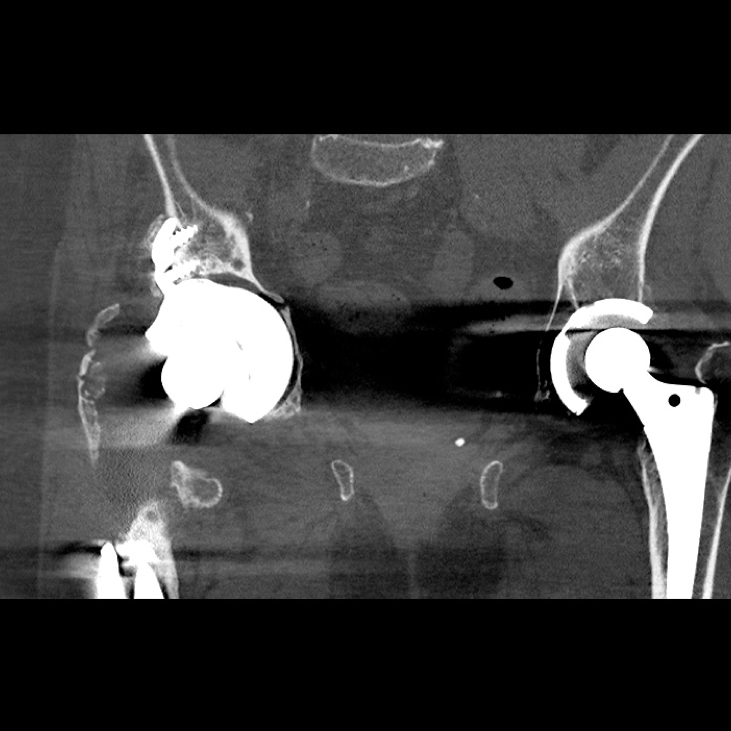
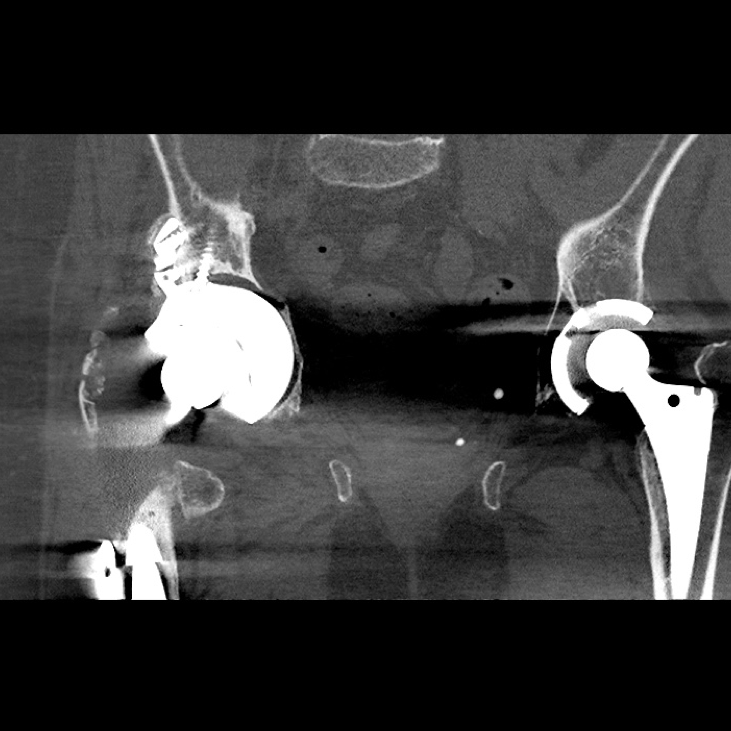
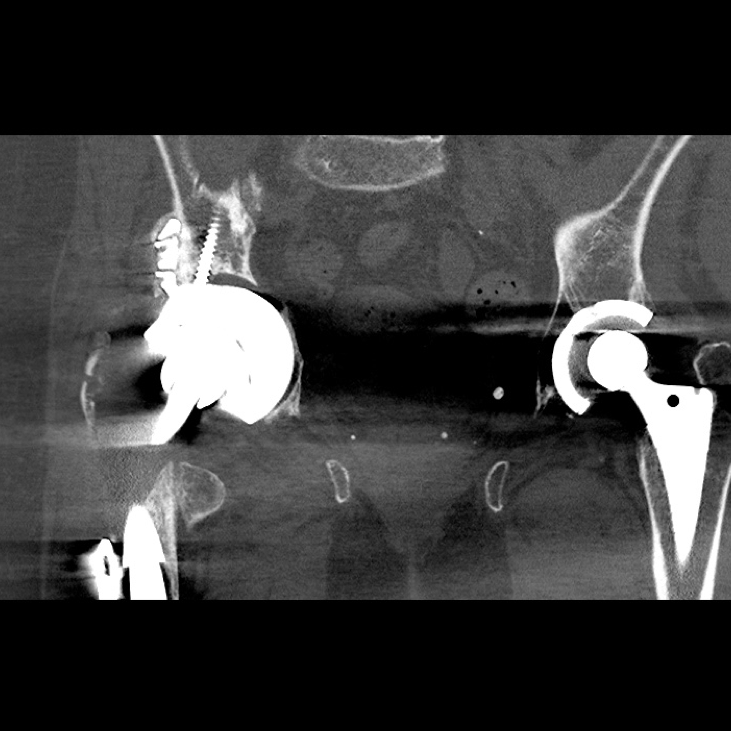
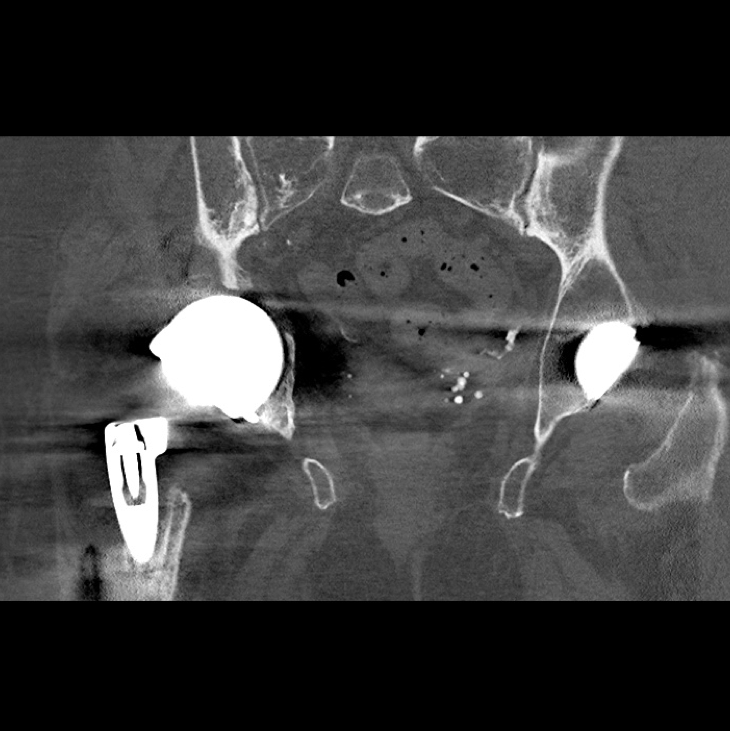
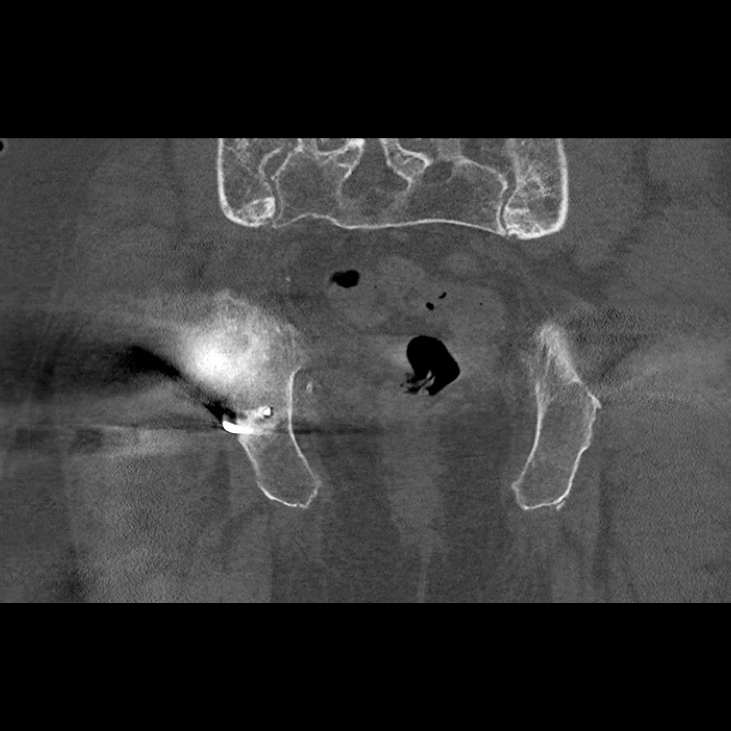
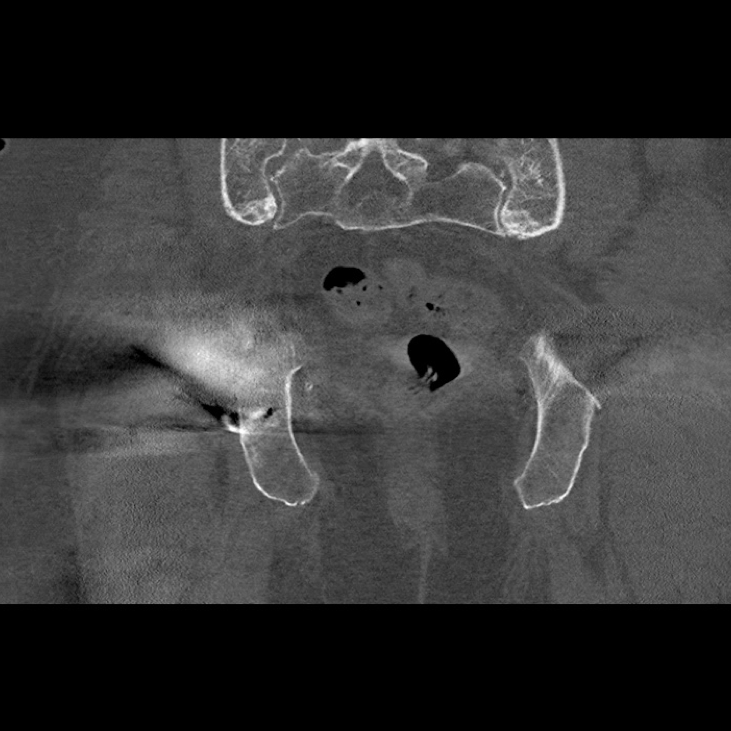
Pre-operative cross sectional imaging demonstrates the extent of the intrapelvic migration


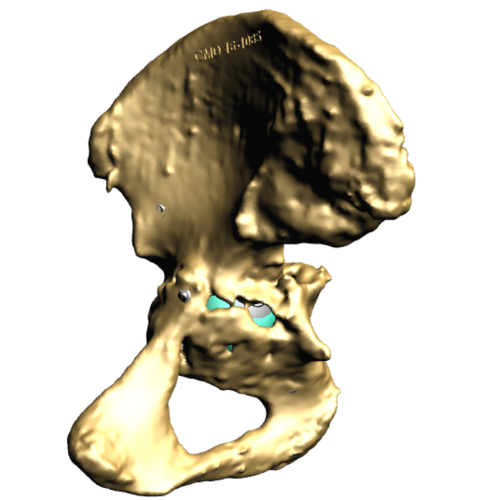
This 3D reconstruction of the patients right hemipelvis was created from the above CT scan.
The Diagnosis
Right hip prosthesis dislocation from a constrained liner with a severe acetabular defect requiring custom reconstruction.
The Plan
Open reduction internal fixation using a distal femoral locking plate prior to the acetabular reconstruction.
The patient underwent a CT scan after the right femoral fracture to plan her custom acetabular component.
Implant Design
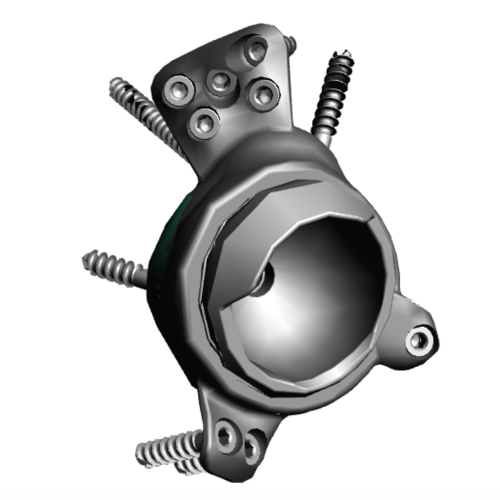
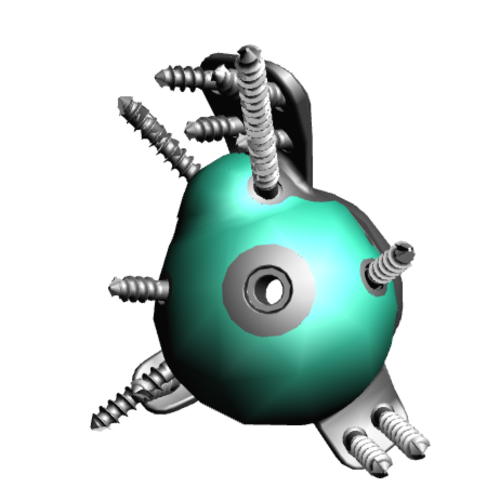
This series of four images shows the design of the custom trabecular titanium implant. This particular implant has a constrained liner. The green regions on the back of the implant show the regions to be made from the trabecular titanium metal
Trabecular Titanium

This image shows the Trabecular Titanium used with these implants. In order to manufacture this structure, rapid prototyping, better known as 3D printing is utilised.
This is made using electron beam sintering, which means the structure is continuous. The pores within the material have been shown to encourage bony ingrowth
The Operation
Key surgical steps:
Posterior approach to allow extensile exposure of acetabulum and femur
Release of psoas and gluteus maximus from the femur, and abductors from the ilium
Explant of old stem and cup
Bone preparation with reamers according to 3D computer plan and checking using sterilised plastic 3D-printed models of the acetabular pre and post bony preparation
3D printed trabecular titanium implant secured
Femur reconstructed with a reclaim stem
Trochanter fracture fixed using fibre tape
Stable with a ceramic head a dual mobility bearing
Wash
The Outcome

Post-op radiograph shows the custom made Trabecular Titanium implant in situ within the pelvis, taken directly post-operatively. This shows a good initial position of the implant

Post-operative AP radiograph taken at the patient's 6-week follow-up review. The implant hasn't moved and is still sitting in an optimal position

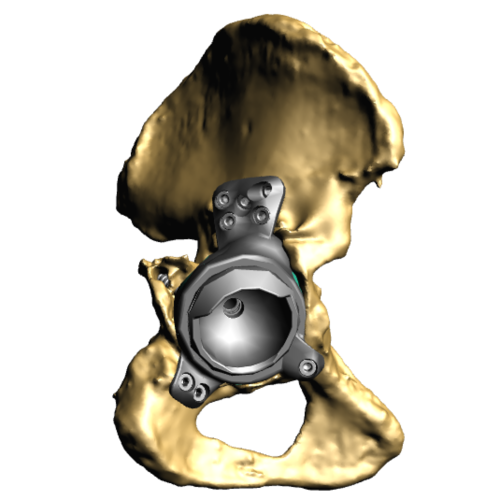
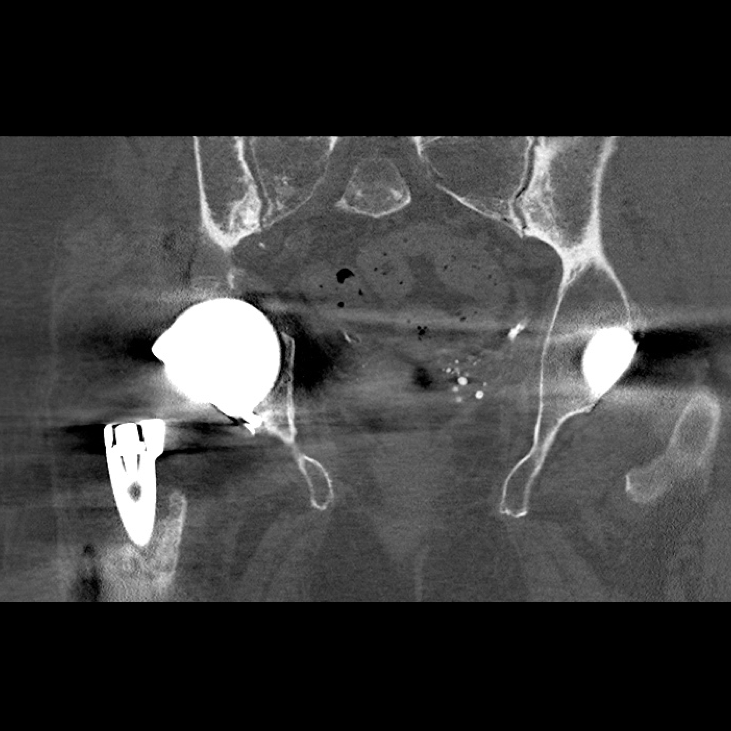
3D reconstruction of implant in pelvis - This is a 3D reconstruction produced from the post-operative CT scan shown to the right. The opacity of the pelvis has been reduced to highlight the custom implant and femoral stem. Note the metal artefact surrounding the right femur due to femoral fracture plate

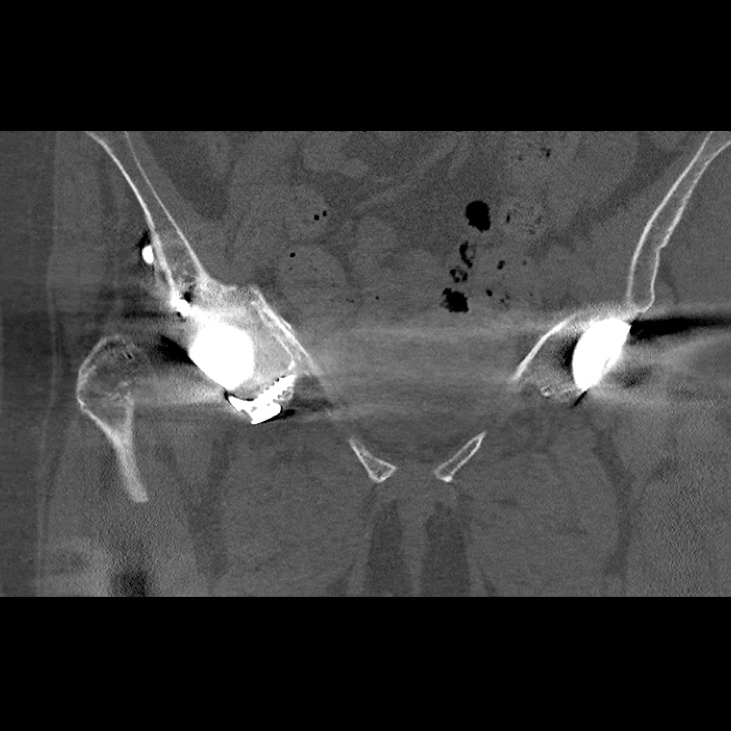


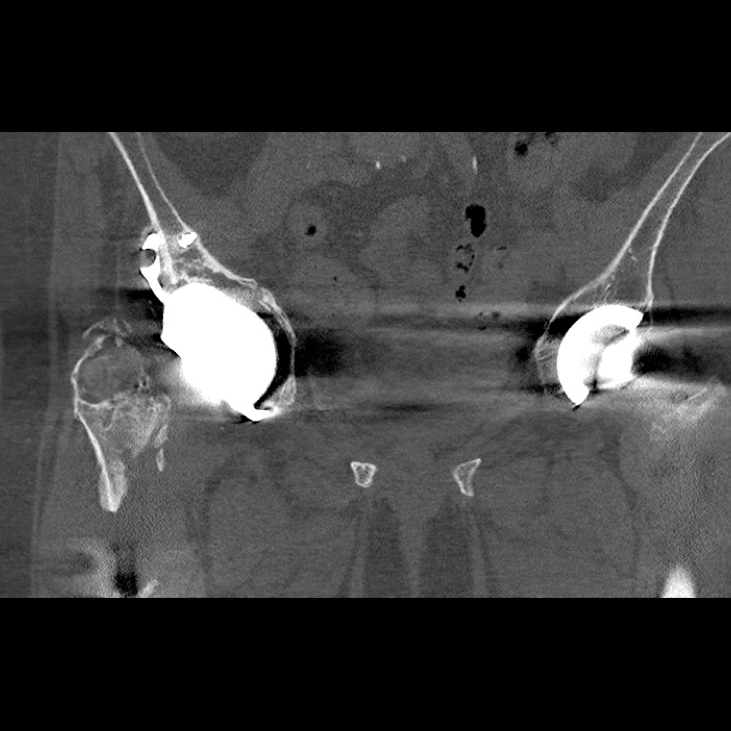
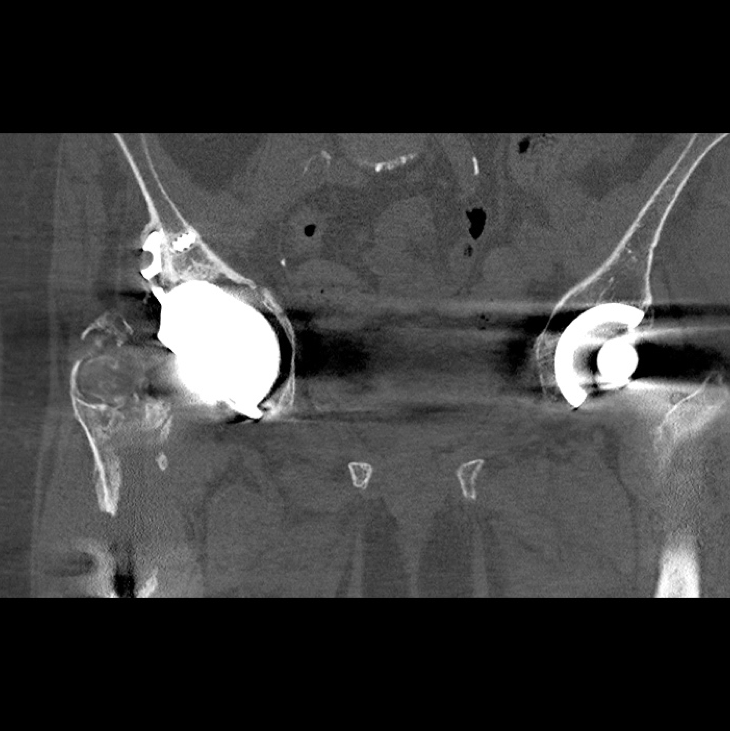
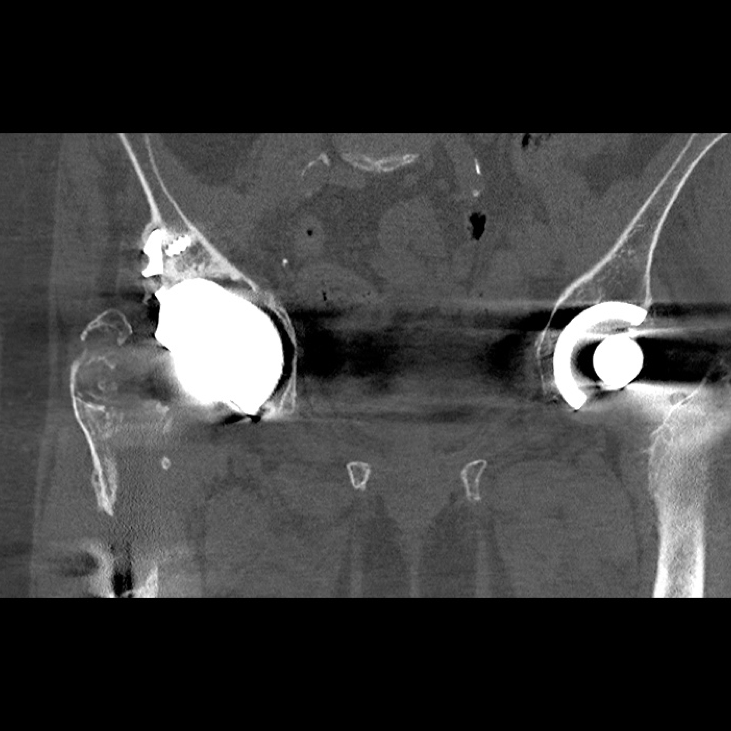
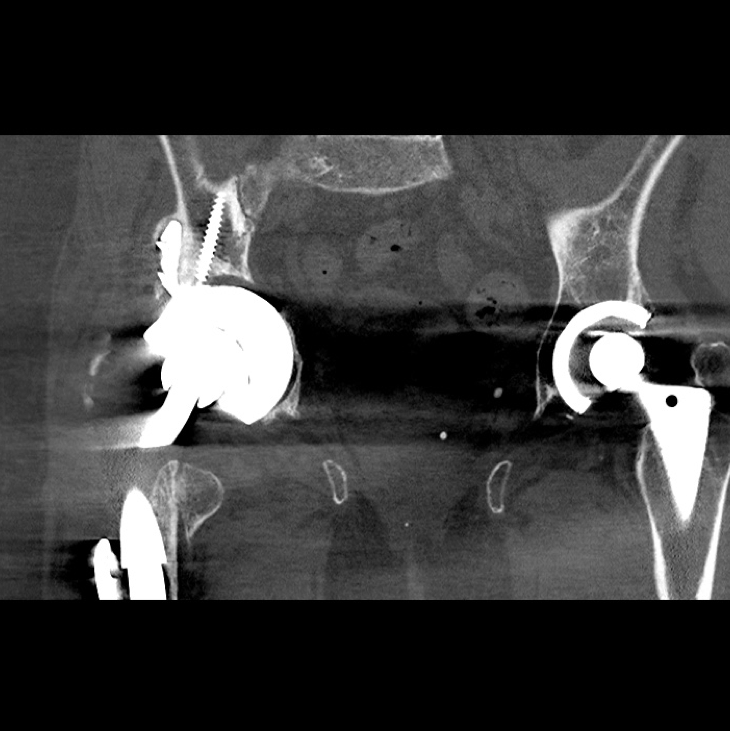
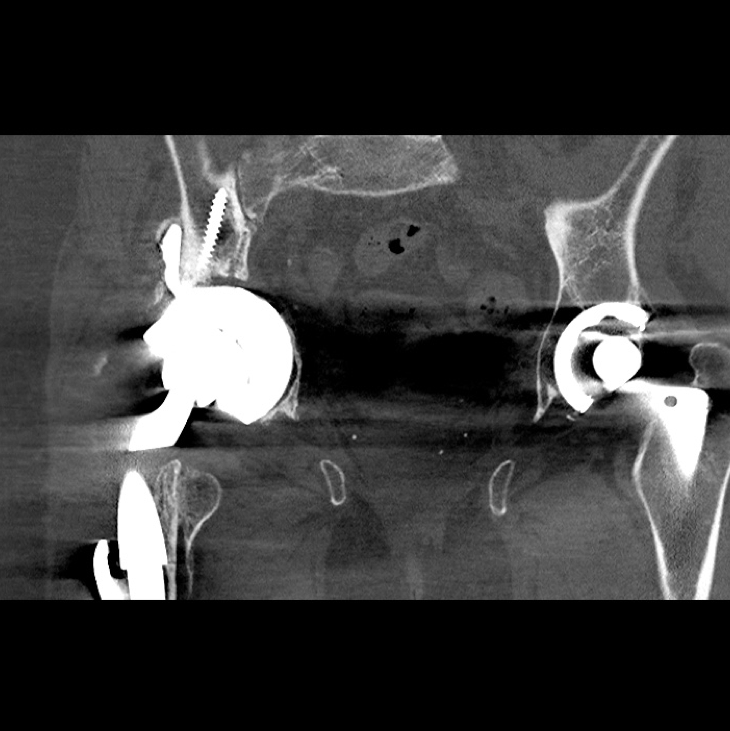
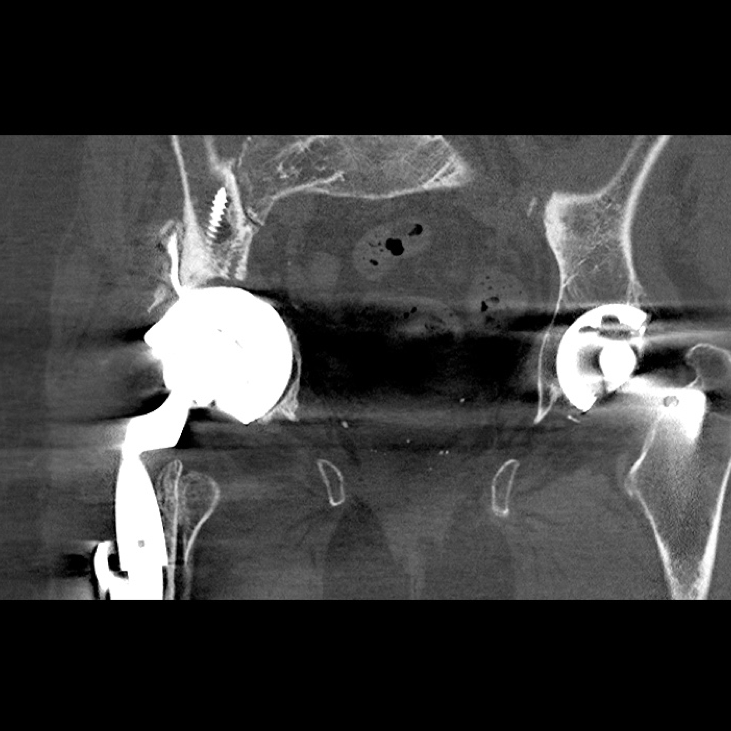
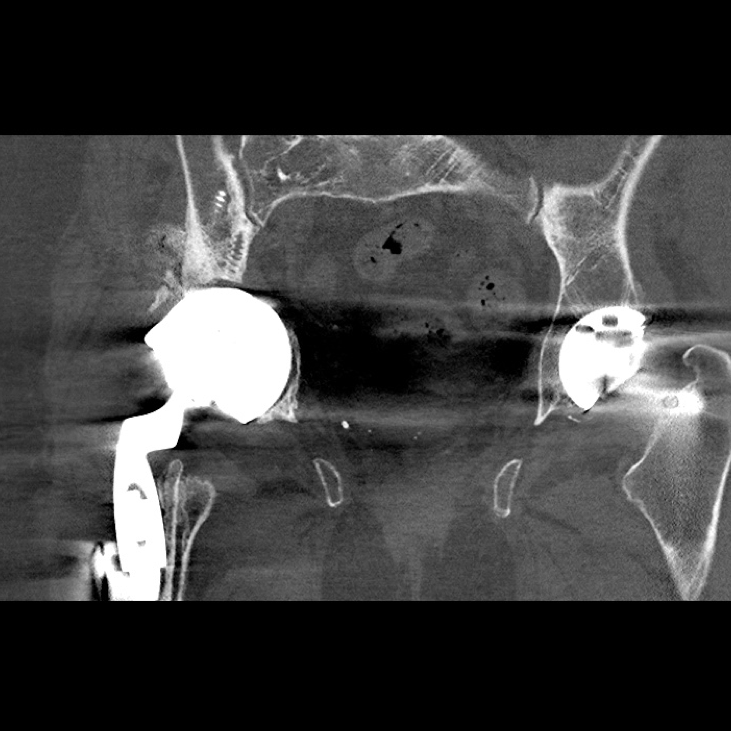


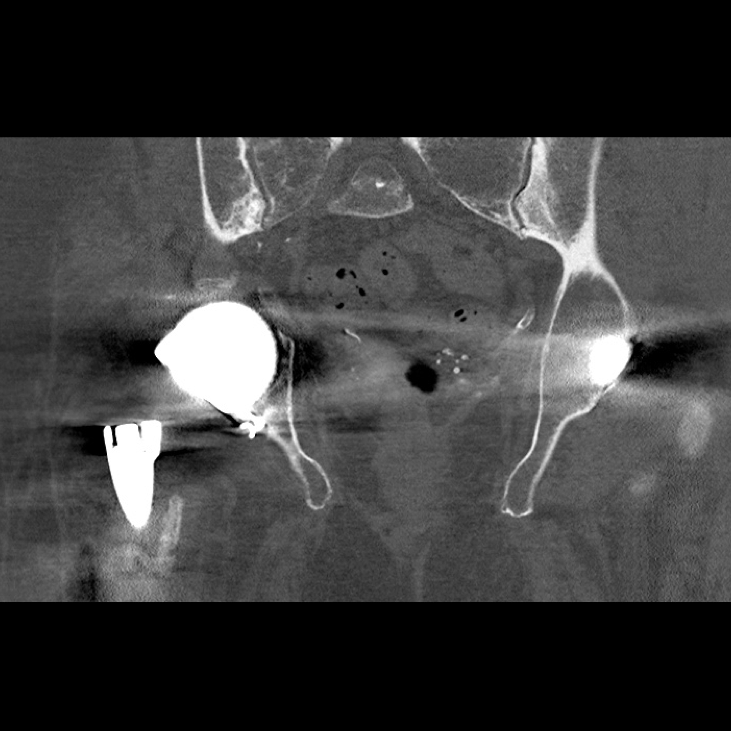


Post-Op CT scan 7-months - This is a post-operative CT scan taken at 7-months post-op. There is no migration of the implant compared to the pre-operative radiograph
The Verdict
“At 6-months post-op the patient was mobilising with a single crutch into the clinic.
The patient understood the extensive muscle damage to her right hip, but despite this was walking 1.5km a day to regain strength in the joint.”