CASE 27: Revision of a loose cup due to massive superior acetabular osteolysis from polyethylene wear, using a custom 3D printed cup

The Story
The patient is a 74-year-old lady who was unable to walk for years due to failure of a previous implant.
She had severe osteolysis of her acetabular component due to polyethylene wear.
The Evidence
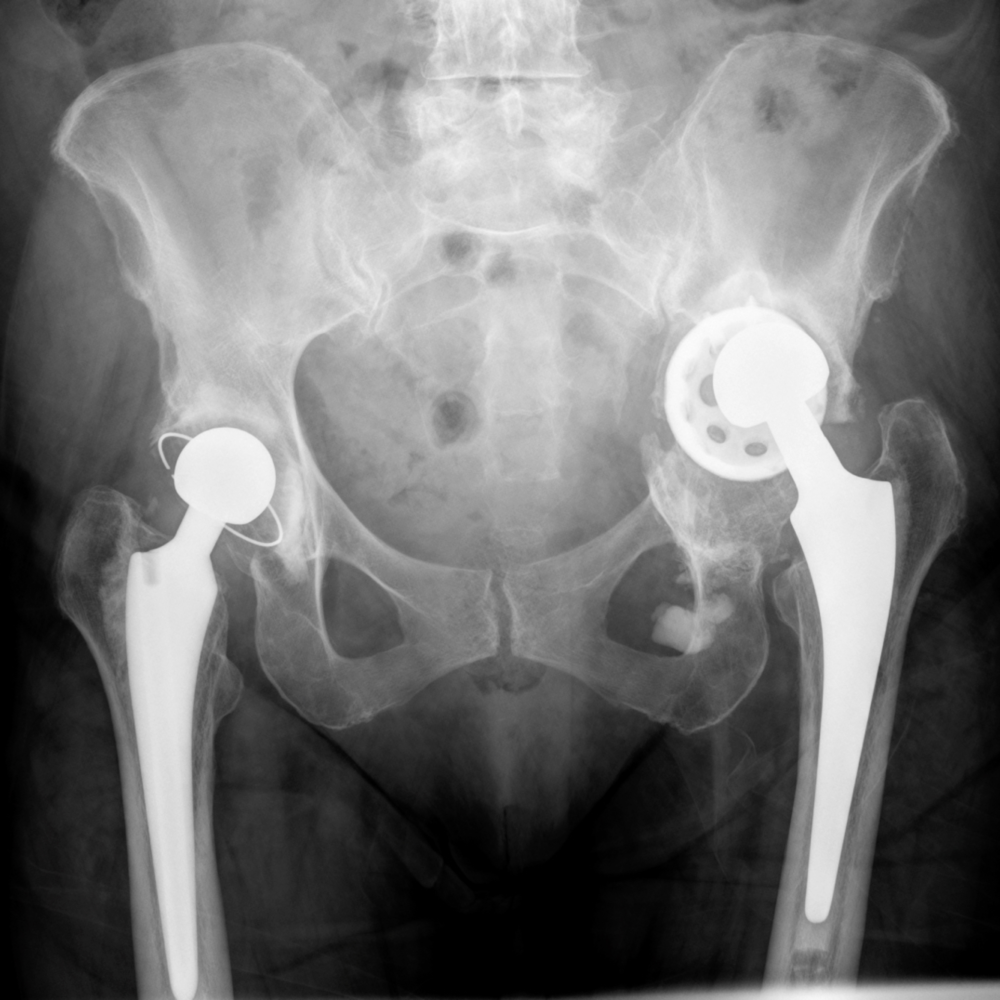
Anteroposterior (AP) radiograph showed massive acetabular bone loss with superior medial migration of the left acetabular cup. The calculated centre of rotation recovery was 30mm to match the right hand side.

3D CT reconstruction - a 3D model of the patient’s left hemipelvis produced from her CT scan. This highlights the anterior column defect and erosion of the medial acetabular wall.
The Diagnosis
Severe acetabular defect classified as a Paprosky 3B with the anterior column of the left hemipelvis completely bisected due to the erosion. In addition the medial wall of the acetabulum is eroded.
The Plan


This series of images shows the design of the acetabular implant. The blue areas of the design highlight the trabecular titanium which is pictured to the right. The final image shows the implant in situ in the 3D reconstructed left hemipelvis.

This image shows the Trabecular Titanium used with these implants. In order to manufacture this structure, rapid prototyping, better known as 3D printing is utilised. This is made using electron beam sintering, which means the structure is continuous. The pores within the material have been shown to encourage bony ingrowth.
The Operation
Key surgical steps:
Posterior approach to allow extensile exposure of acetabulum and femur.
Release of psoas and gluteus maximus from the femur, and abductors from the ilium.
Bone preparation with reamers according to 3D computer plan and checking using sterilised plastic 3D-printed models of the acetabular pre and post bony preparation.
3D printed trabecular titanium implant secured with at least 3 good screws.
Dual mobility bearings 44mm.
Cement-in-cement, small sized stem to allow for adjustment of offset and leg length.
Wash.
The Outcome

Anteroposterior plain radiograph This is the post-operative AP plane film radiograph. The large custom implant is in situ with its superior and inferior flange.


These images were taken at 6 months post-op. They are EOS images, taken in a functional standing and sitting position using low-dose bi-planar x-rays to assess the functional position of the implant.
The Verdict
“The patient is very happy with the outcome of her custom designed and manufactured 3D printed titanium implant.
At 6-months the patient was mobile and able to straight leg raise to 45 degrees and flex her hip to 80 degrees.”